
Manual pump Nozzles Valves/filters Convert manual screen wash to electric Schematic
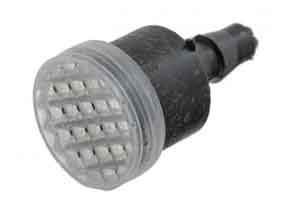
One dual nozzle on GTs to 1977: (Moss Europe)
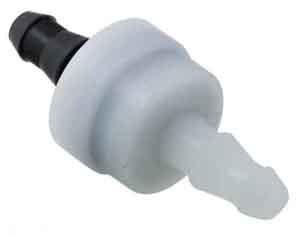
Two black plastic nozzles on all cars from 1978: (Moss Europe)


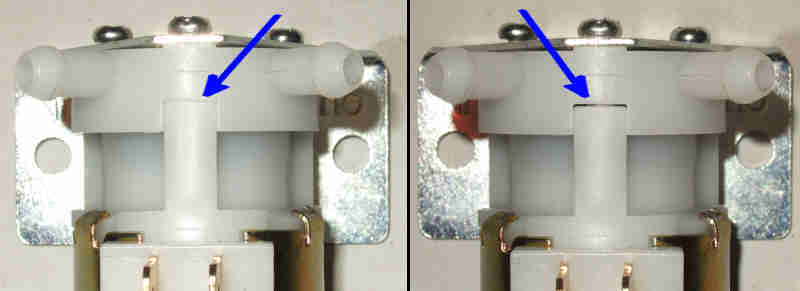
On Bee's bottle valve the valve flaps are visible so if there is a filter it must be behind those which would makes no sense:
Moss Europe indicates they only included a filter from June 73 with the change from the bottle to the bag:
In-line valve. Parts Catalogue says "13H6501 (was BHA4610)" but does not indicate where it was used, Moss Europe says "GWW504 GT" and others indicate GT only, Brown & Gammons does not list it at all:
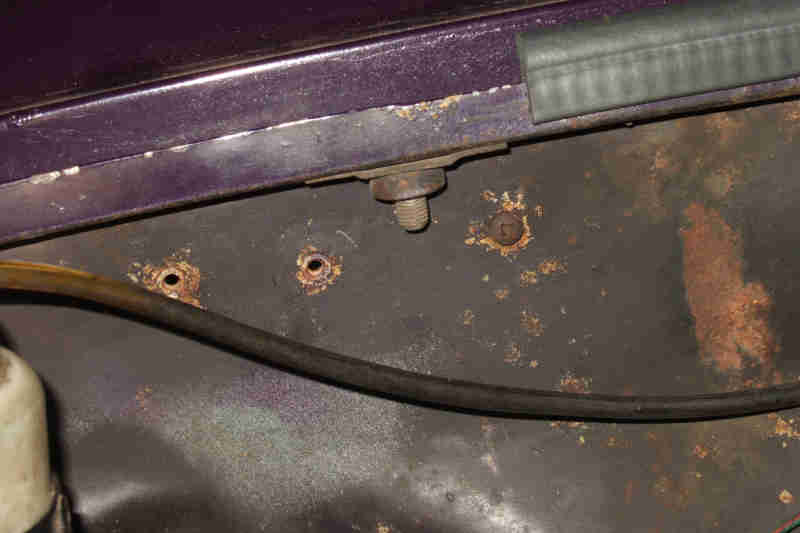
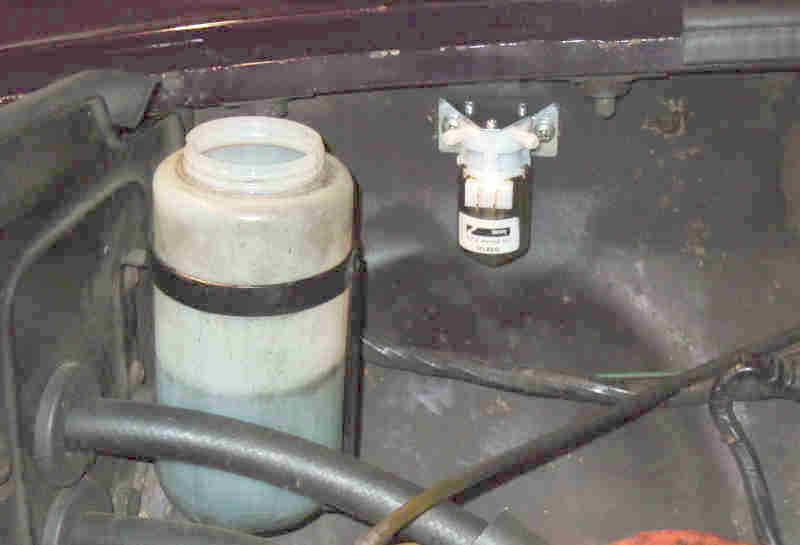
However roadsters prior to 1977 have dual nozzles with a tee linking them whereas GT have a single dual-port nozzle. So the roadsters need a tee, and that tee includes a valve. Form 1977 both roadsters and GTs had that arrangement. The Parts Catalogues don't indicate by either the drawing or the description that this is the case, and the 77 and later catalogue seems to have a complete mis-match in item numbers between drawing and list, but one of the plain tees in the both catalogues depicted as 13H6472 includes the filter. GWW408 is a later number but few places seem to have either of them, some showing a separate tee and in-line valve with a short length of tubing to connect them:
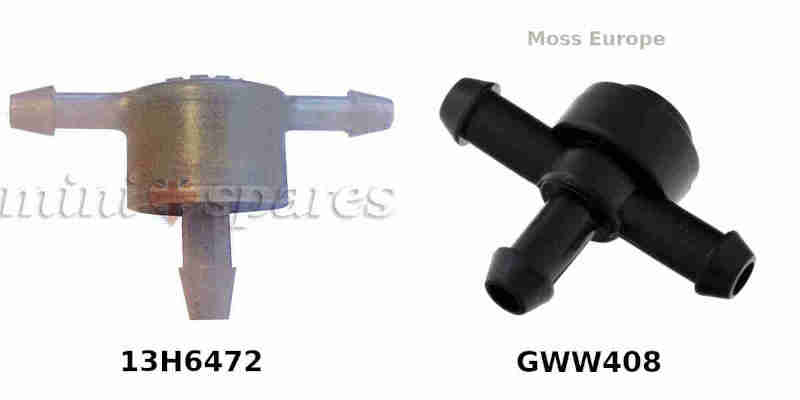
Note that 13H6472 on the face of it needs larger bore tubing for the inlet port (and one supplier states that), whereas GWW408 ports seem to be the same (not known) size. The larger 13H6472 port is the same size as both pump ports, but one run of tubing connects the 4.7mm port on my bottle to the 5.7mm port on the manual pump.
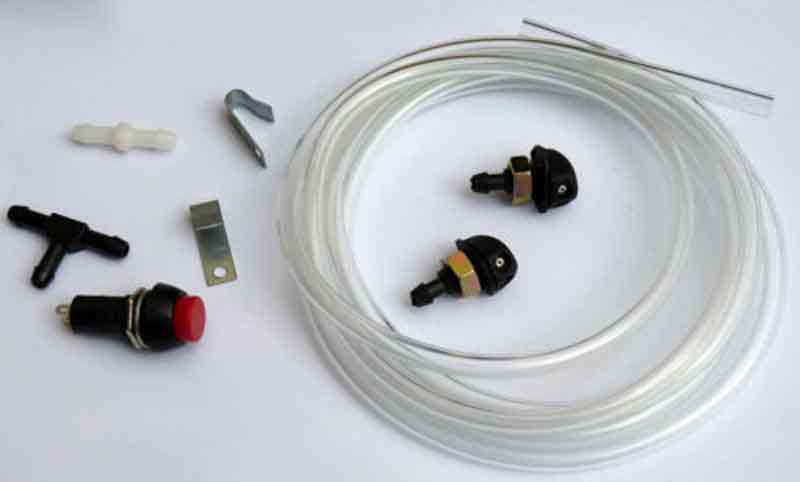
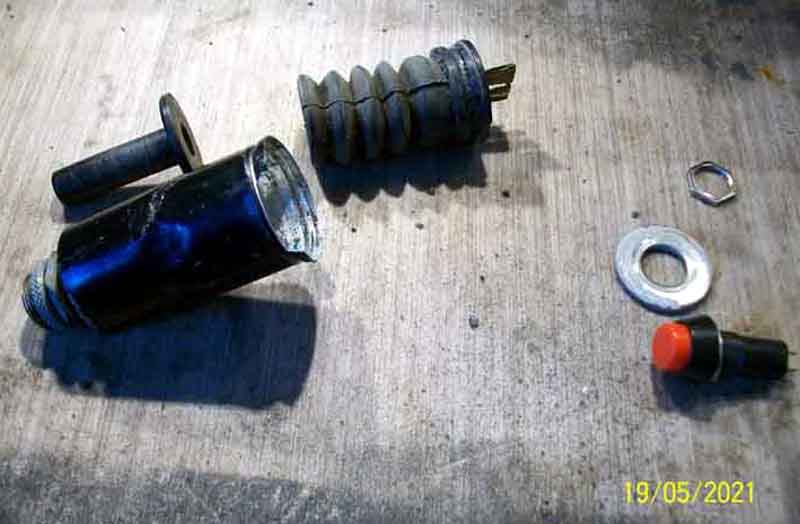
Dave Birkby: I tried to open the old pump to see if I could salvage it but I inevitably damaged the end doing so. Shame maybe because the problem was corrosion in the pump main bore that was simply jamming the plunger in the 'in' position. But as my plan was to fit an electric pump, I ordered a kit online which consisted of pipe, joiners, nozzle jets and a small momentary push switch, smaller diameter than the hole in the dash:
I found a washer in my tool box that had a 12mm inner hole (to take the switch) and 28mm diameter which fitted in the bore of the old pump:
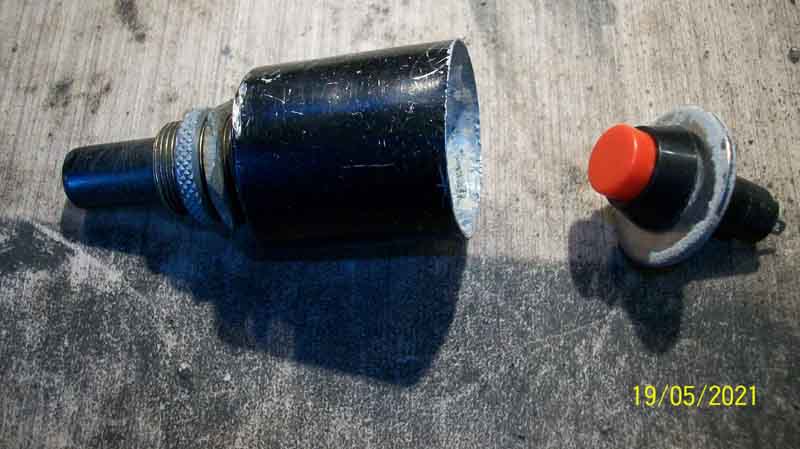
With the bore cleaned up I put the original plunger back in and dropped the new switch in behind it:
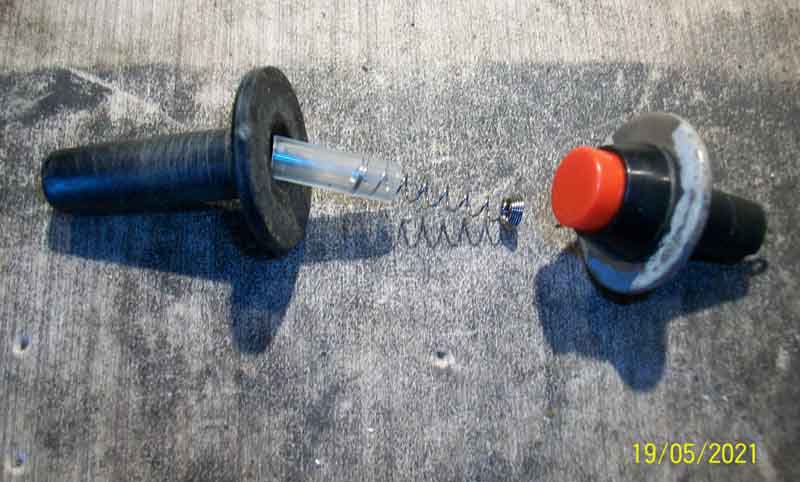
I didn't want any 'noticeable' feeling of a gap between the two switches so I put a small light spring to keep the plunger out but not operate the new switch:
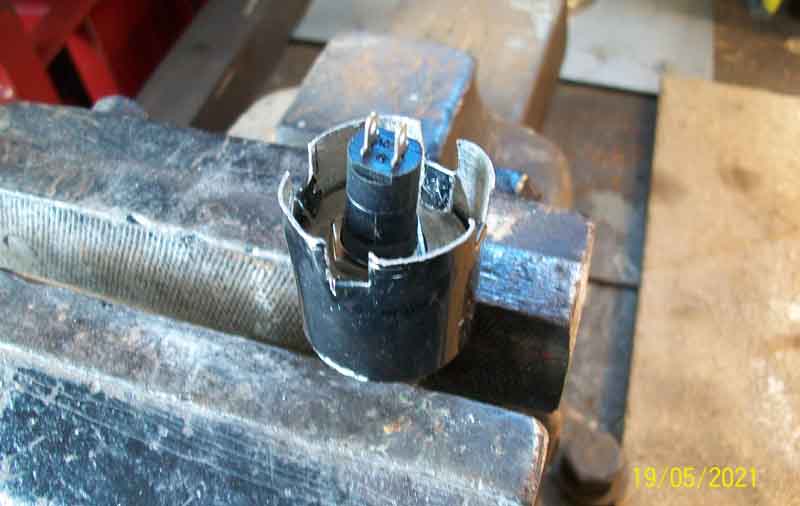
I cut the body down to within about 5mm of the steel washer and then cut tabs out of the body to hold the switch in. I bent the tabs over which worked well and I have since finished it off with a foam washer:
It feels decent to operate and touches the new one within about 5-6 mm of movement and returns nicely. And it looks like it did before.
November 2021: Ditto for Bee: I fancied doing the same thing myself before the pump gave me any problems but didn't rush into it. In the 'once a year operation prior to the MOT' I had a real struggle to get any water out which turned out to be the valve in the washer bottle foot partially dislodged. A moments work to fix, but time to think seriously about converting. I didn't want to mangle Bee's so got a used one from Andy Jennings, and a cheap pump off eBay. The tubing and nozzles can stay.
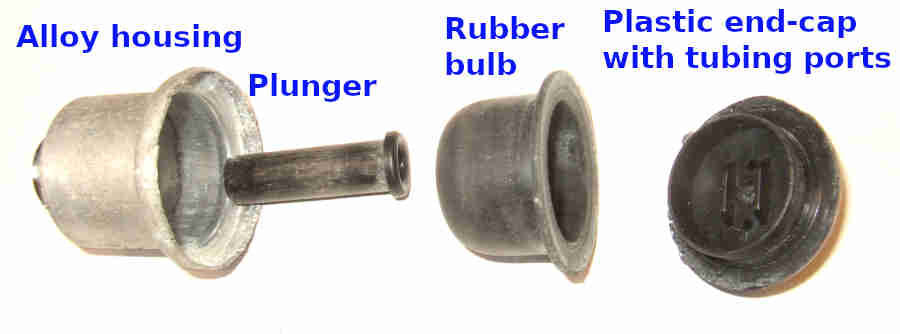
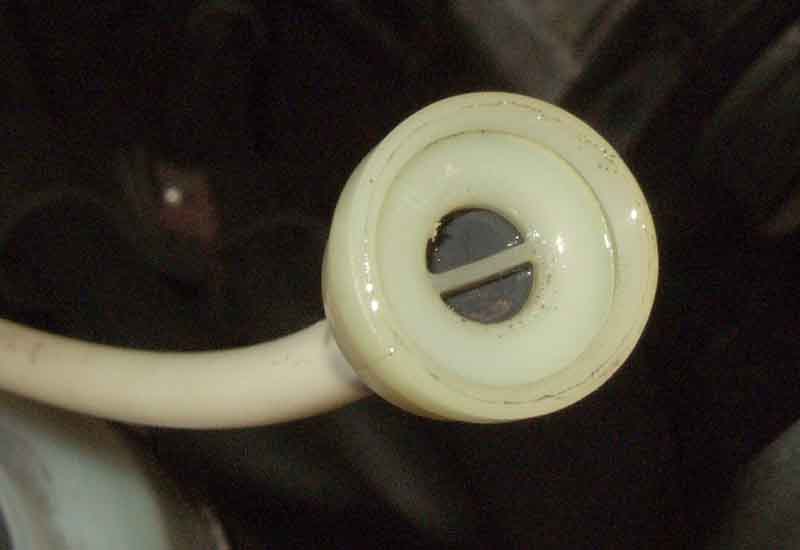
My pump looks shorter and fatter than Dave's, and with careful levering round the turned over edge of the alloy housing I released the plastic end-cap, and the rubber bulb and plunger fell out (incidentally unscrewing the slotted nut that holds it in the dash will also release the plunger on this type):
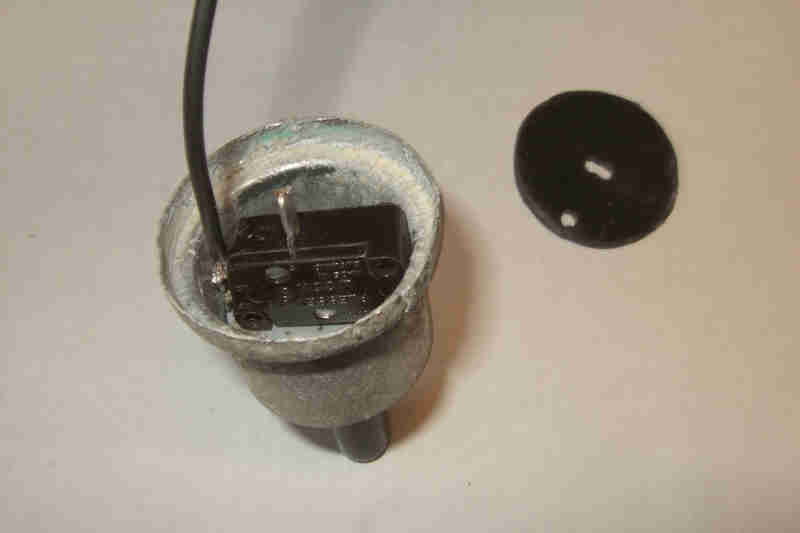
Pondering the switch to go inside, it suddenly occurred to me that a micro-switch might just fit in my large housing, and with a bit of tweaking to the NO and NC terminals on the side it does indeed go in and the contacts help it to stay there. The 'normally open' contact is on the end of the switch and touching the housing, which is probably at earth potential on the dash, so I connect an earth wire to that and have 12v at the pump, which happens to be how they are wired from the factory. I'll have to cut off the 'normally closed' contact so it doesn't touch the housing or it will operate the pump with the plunger released! The pump plunger is much narrower than Dave's and doesn't line up with the switch button, so I cut a circular disc to go between them.
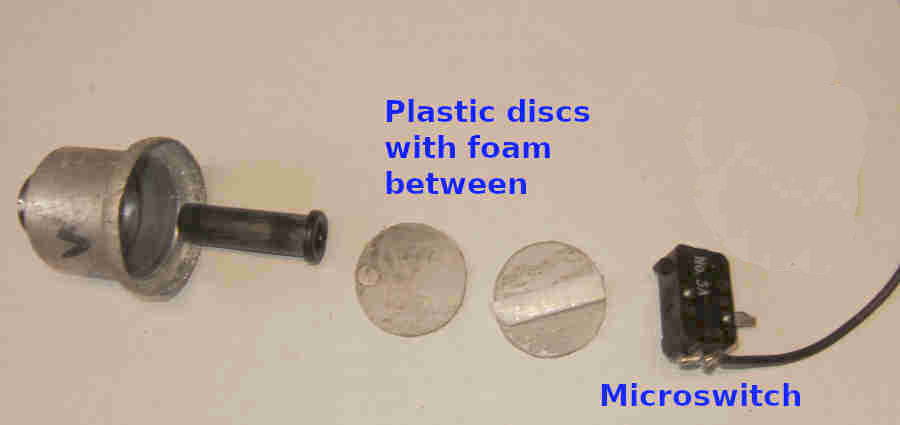
With very little movement of the switch plunger the pump plunger would rattle about unless I positioned the switch very carefully, but a second plastic disc with a strip of draught-proofing foam between them results in a 'soft' feel and no rattle. Somewhere I have a packet of assorted springs bought decades ago, which may include a compression spring that would fit down inside the plunger to take up all play but would still need one disc, but needless to say I can't find them.
Thinking about mounting the switch I find there is just enough room inside the housing to push the switch all the way in, with another plastic disc on top to be held in place with the edges of the alloy housing turned back over again.
The pump plunger only moves about 3mm before the switch operates, which is less that I would like, but it does work and is really neat even though it won't be visible once installed!
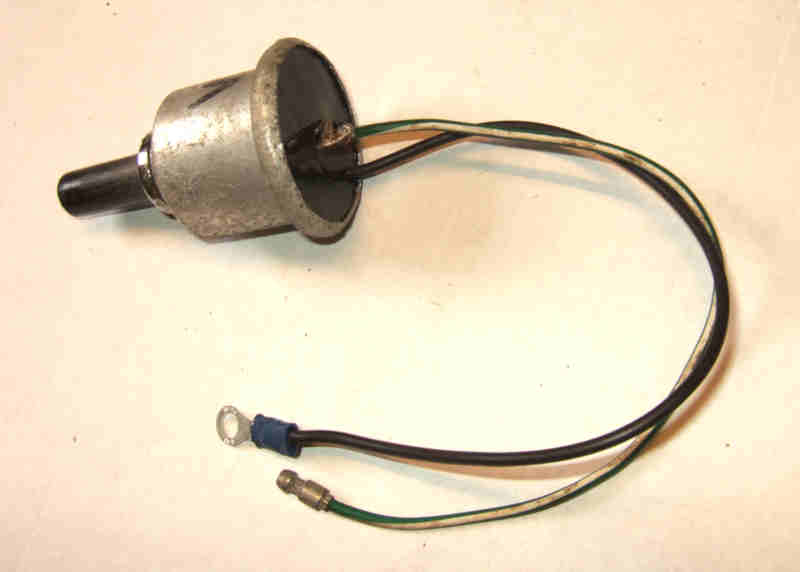
I'll have to pull the tubing off the existing pump, and being tight see if I can use a short section of hose or tubing to join the two ends together behind the dash.
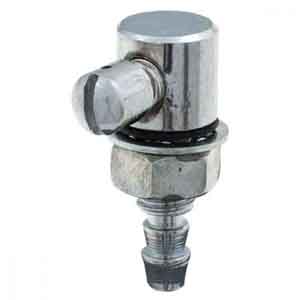
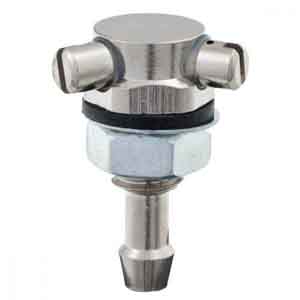
I Googled electric pumps and got a Peugeot item (left below) for under £4 which has a very large port which I assumed was the inlet that pushes into the bottom of the screenwash container, the other port being standard for tubing. The large port was going to be a bit of a fiddle to connect to tubing so I used it for another job (don't ask ...) and Googled again and this time found an Austin/Morris item with more conventional ports for less than £3! Testing that dry it's really noisy compared to the Peugeot item so I use the AM pump for the other job, and since I had come up with a way of reducing the large port to accept tubing for that job can use the same on the car.
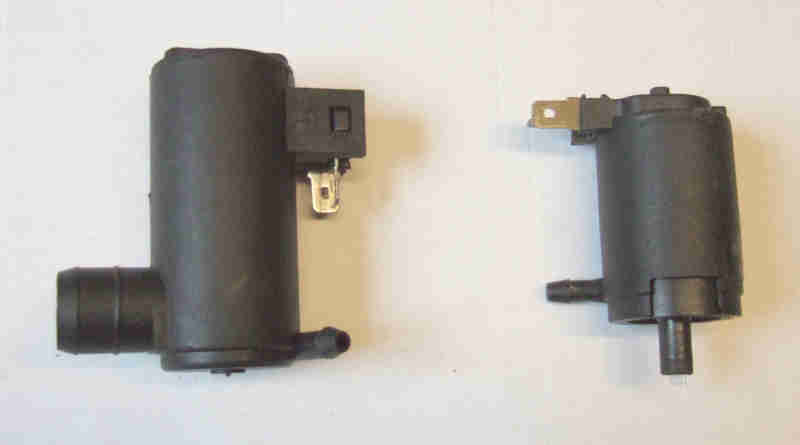
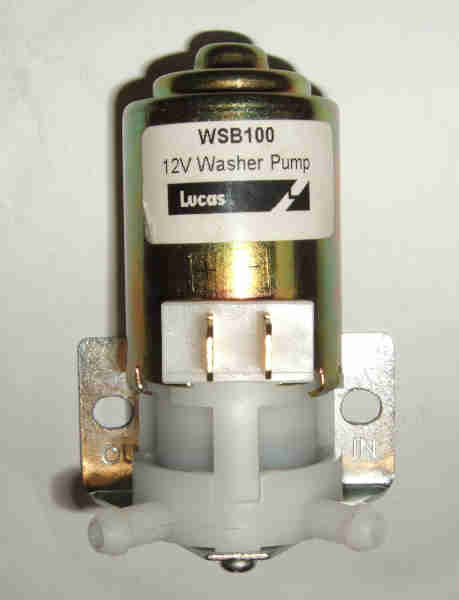
However neither pump sucks water up when fitted with tubing on both ports and tested in a bucket! I can sort of understand it for the Peugeot pump as that is designed to connect to the bottom of the bottle and so is kept full of screenwash. Less so the AM item as although the port at one end is slightly bigger than the side port and I'm assuming that is the intake, unless it pushes into a receptacle sticking out of the bottom of the bottle it's not going to be kept full of water. That one blew air out of either port (connected to tubing with the end in water) if the polarity was in the appropriate direction, so why it doesn't suck up with the polarity the other way round (it didn't blow then) I don't know. MGB pumps are mounted to one side of the bottle but the intake tubing goes up to the cap and down inside. So that must be able to suck water up without priming as Vees which was removed from the car and dry for many months during the engine rebuild and repaint worked straight away on re-installation. So, I'll just have to get one of those for a tenner (GWW125, WSB100), and suck that up.

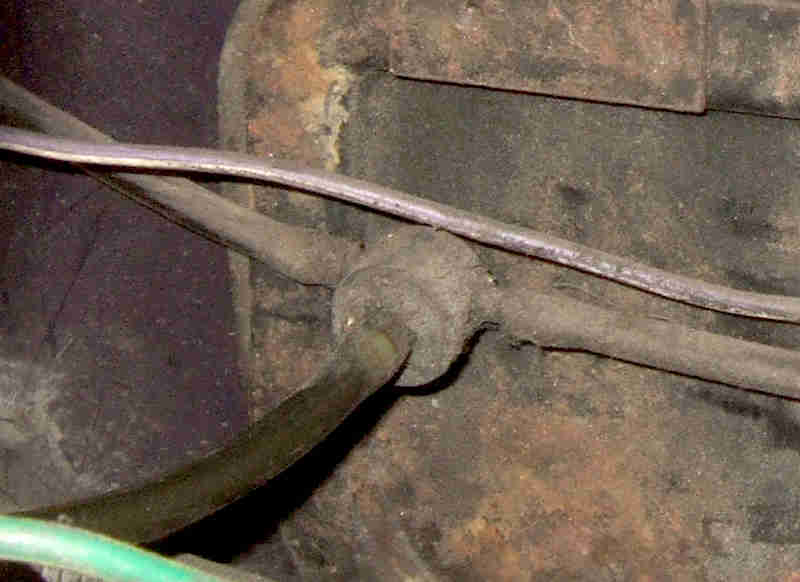
Tubing is the next consideration. The existing tubing will just reach the pump with it inverted, but I'll need a short piece to get from the pump to the bottle, but what size? Measuring the various ports I get 4.7mm for the bottle, 5.7 for the manual pump I have modified (not necessarily the same size as mine as I haven't taken that out yet), and 6.1mm for the new pump! I don't see how I can go any bigger than 5mm ID tubing or it will be sucking air in at the bottle, and 4mm would be a bit of a stretch for the pump. As it is I'll probably have to warm them with a heat-gun to stop them splitting, especially the original tubing on the new pump outlet. However looking at eBay sources the minimum length is 0.5M at nearly Ł3, whereas 10M is less than Ł6! 10M will allow me to replace the whole length, avoid the join where the manual pump now is and should have less chance of splitting on the new pump than the original tubing, so that's what I go for.

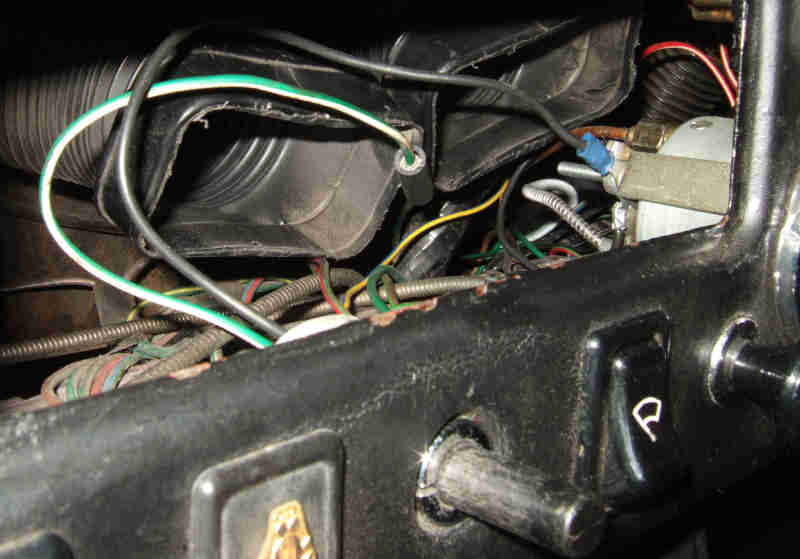
Then by twisting the pump body back and fore and holding the 'nut' for the 'back' and releasing for the 'fore' it unscrews without having to use pointy pliers in the slots of the nut. Same type as the one from Andy Jennings i.e. the plunger and nut come out the front of the dash and the pump from the back. Untangle it from the heater cable and some wires and I can lift it out of the vent slot to get the tubing off the ports, and a bit more wiggling gets the short piece from pump to tee/valve off as well. Three days passed before I got any update from the eBay vendor which is annoying, and looking at their feedback there have been more than 50 complaints about non-delivery and incorrect items in the last six months! Shoulda paid a few coppers more. I've had such good service from eBay people for so long now that I must admit I stopped checking the feedback, I'll have to start doing it again. It also occurred to me that with the long pipe removed from the pump less is needed to reach the tee/valve, so I could pull a bit back to give me more in the engine bay should I need to mount the pump the other way up.

All done it's time for a test, and dry first with the foot valve out of the bottle, then in and water soon squirts out. Passenger side nozzle is a bit low, something not easy to notice when you are only getting short squirts with the manual pump, but the nozzle jet turns easily to be as high as the driver's side. Not that I expect to be using them until the next MOT!