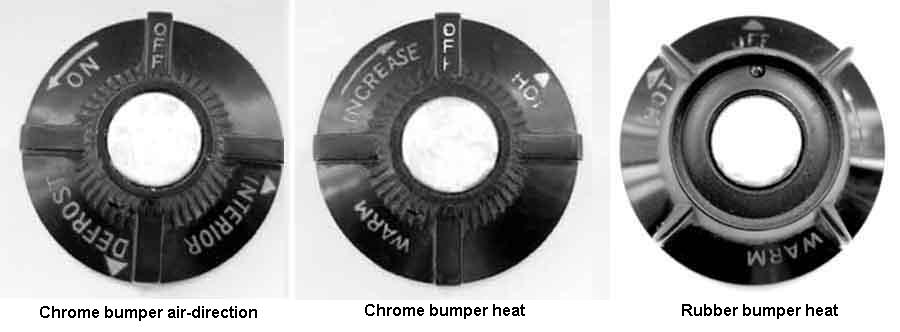
The wonderful illogicality of the chrome bumper controls - the heat control has to be turned clockwise to turn it on whereas the direction control is turned anti-clockwise, which is the more natural direction for turning a rotary control on, I suggest. This is because both dash controls pull the cable when turned anti-clockwise, and push it when turned clockwise. However the air flap at the heater unit shuts off air flow when the cable is pushed, but at the tap on the cylinder head pushing the lever opens it for heat, and that is where the illogicality comes from. The operation of the dash control for heat was reversed on rubber bumper cars and V8s so that turning it anti-clockwise pushes the cable instead of pulling it, so then each controls is turned anti-clockwise to get heat or air, and turned clockwise to shut them off:
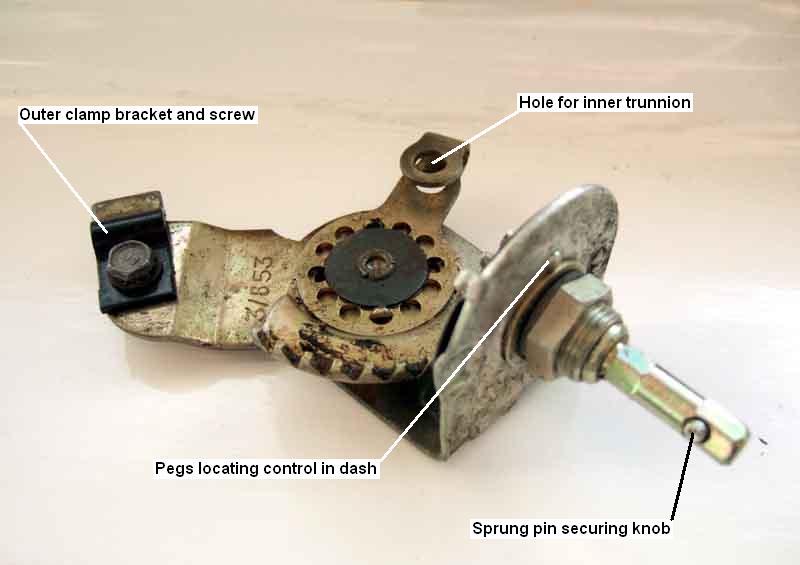
Showing the holes in the metal dash-mounted heat-control knobs, direction control knobs are similar. Press down the sprung pin at the bottom of this hole to release the knob. If the control shaft has rusted badly the corrosion could have expanded to jam the knob onto the shaft:
Showing the pin that retains the knob, with the spring that presses it outwards. In this example the spring has lost some if its tension, normally it would be pressing on the back of the pin. The pin has a flange to retain it in the shaft with the knob removed:
The end of the spring is turned up at the pin end (arrowed in the above), so a spike can be inserted and that end of the spring levered up to remove. There is a small projection on the curved end of the spring, that locates in a hole in the shaft (both arrowed), when refitting the spring. The hole in the spring is larger than the flange on the pin, so the pin can be refitted before the spring:
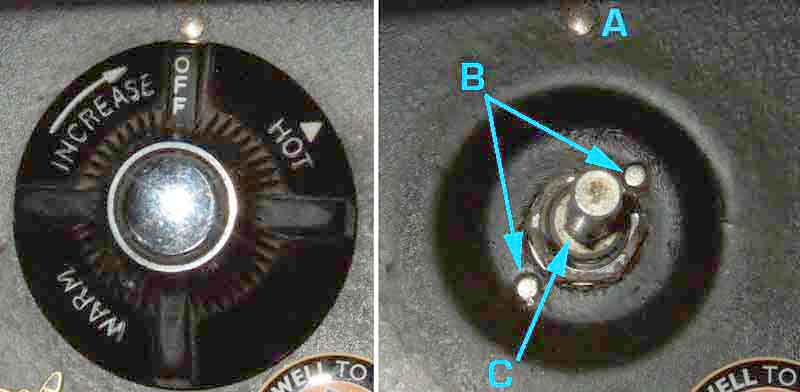
With the knob removed you can get at the nut which when undone allows the control to be withdrawn from the rear of the dash. You can also see the pegs and location holes to correctly orientate the control in the dash so the control knob legends are correctly aligned with the datum pin (A). Chrome bumper heat control location pips (B) are at 2 o'clock and 8 o'clock, and when set fully anti-clockwise (off) the knob location pin (C) is at 7 o'clock:
Rubber bumper dashboard heat control location pips are at 10 o'clock and 4 o'clock, and set fully anti-clockwise (hot) the knob location pin is at 9 o'clock:
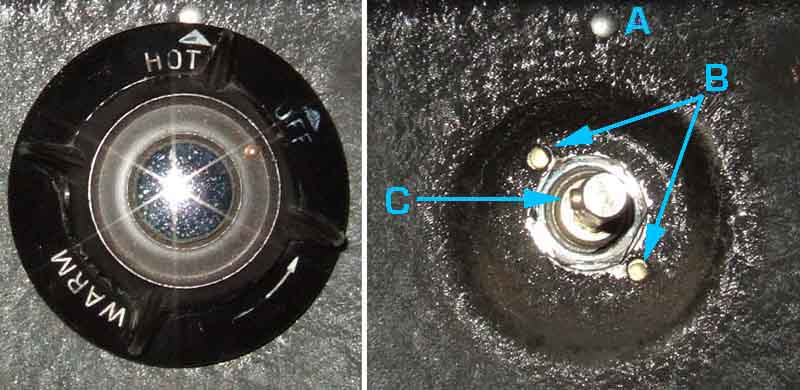
The dashboard air direction control location pips are the same for both chrome and rubber bumper at 12 o'clock and 6 o'clock.
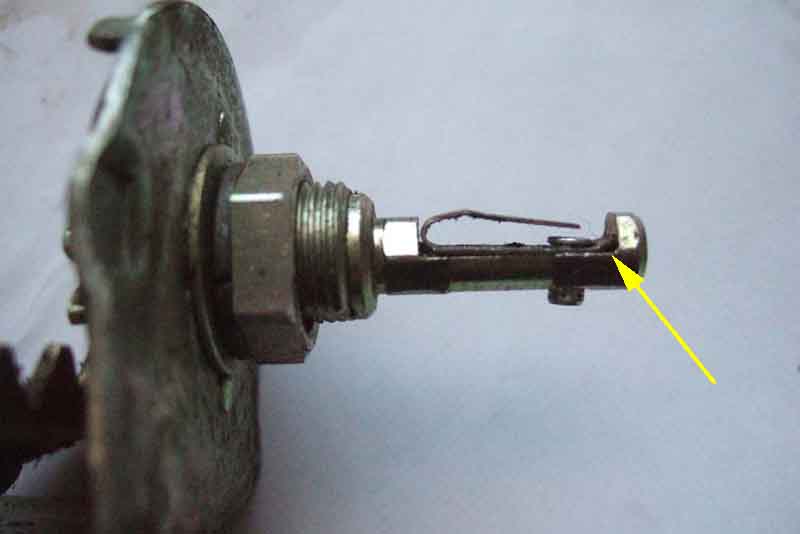
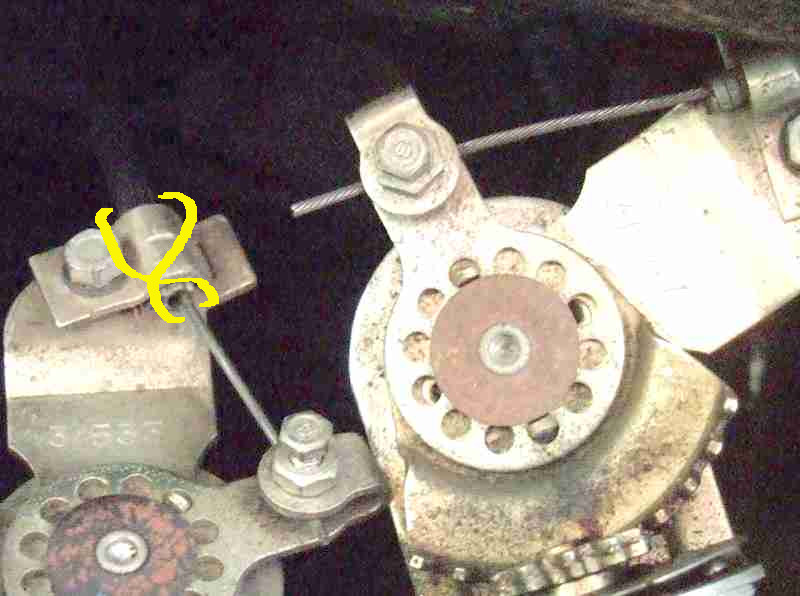
On UK cars there should be enough cable to bring the control below the dash to access the cable clamps or for lubrication. Out of interest the multiple holes shown in the moving lever (and there are more in the fixed bracket underneath) allow a set of components to be assembled in various ways to suit many orientation and operation direction requirements. This is a 1980 heat (I think!) control:
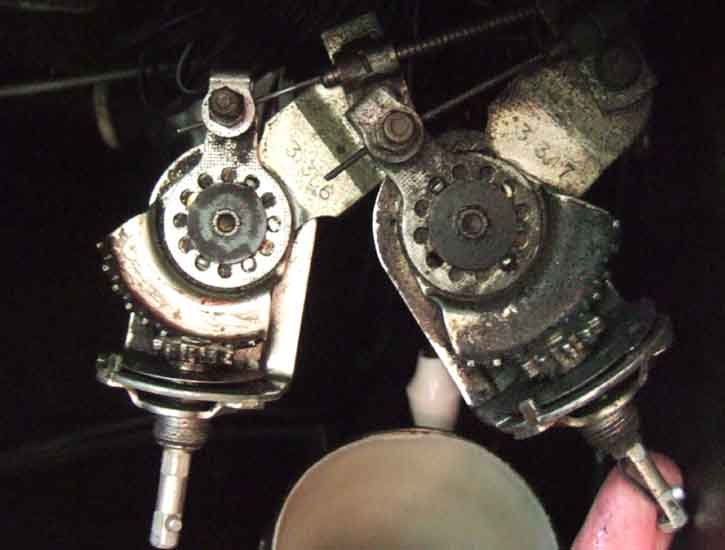
The controls of my 73 roadster, 3/366 for heat (left) and 3/347 for air (right) ...
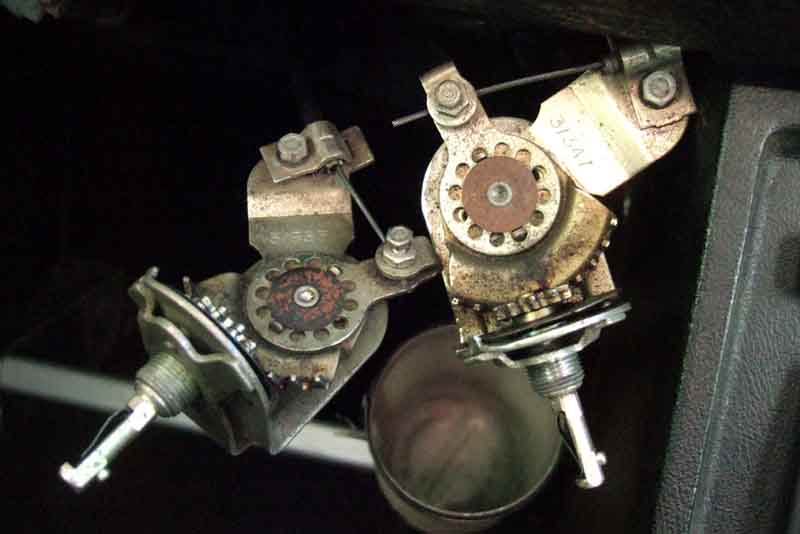
... and 75 V8, 3/533 for heat (left) and again 3/347 for air. Compare the two heat controls and note how the moving parts are positioned on opposite sides of the sheath clamp so the control operates in the reverse direction:
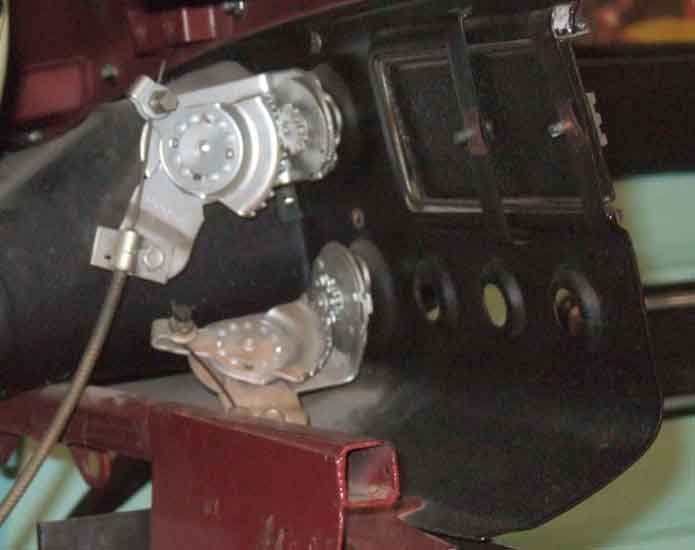
As you can see tin-dash controls are quite easy to get to where you can work on them.
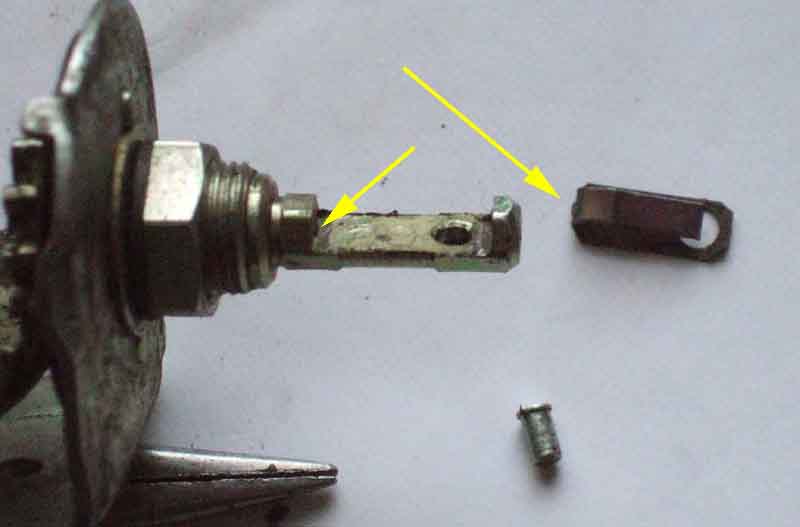
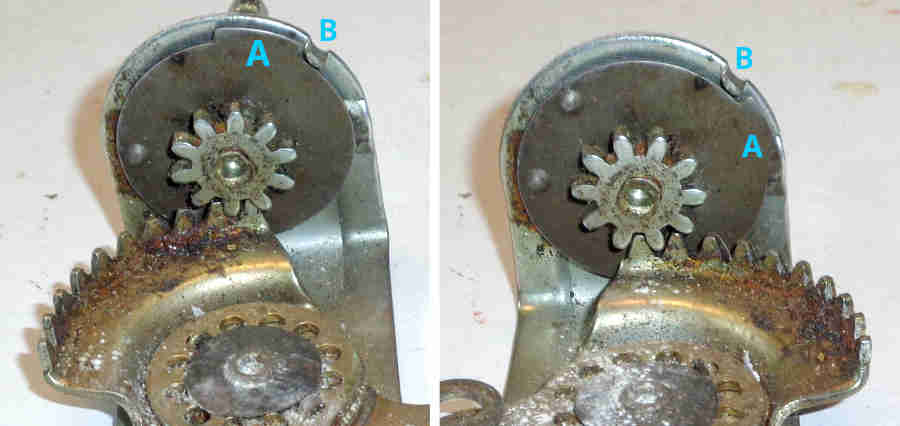
The range of movement of the control is determined by a moving tab 'A' on a disc that rotates with the spindle and small gear, and a fixed tab 'B' on the body of the control, here shown in each of the two extremities of movement. The protrusions round the edge of 'A' are trapping a ball-bearing against the back-plate and there is a similar indentation in that to give click-stops at fully on and fully off:
Not easy to see here but the V8 has a different sheath on the heat control (left). This has a nylon core with four steel wires running length-wise in slots, inside a plastic sheath, as opposed to the wound steel outer of the roadster. This overcomes the problem of the wound steel outer expanding like a spring when pushing the inner to open the heat control, but can have the opposite problem of pushing the outer through the clamp when pulling on the inner to close it, because the clamp can't grip the plastic and nylon outer as well as it can the wound steel. I don't have a photo but at one time I had to use some stiff wire twisted to make a loop around the inner then over the clamp and under the inner. The loop around the inner allowed that to go back and fore but restrained the outer when pulling on the inner:
Both cars have wound steel outers with stranded inners on the air direction control. This seems strange given that the inner has to push the air direction flap closed as well as pull it open, rather than pulling against a spring to open and the spring pushing it shut, but it works well enough.
The heater controls on the LHD cut-away at Gaydon. This shows both controls having the same orientation i.e. turning anti-clockwise pushes the cable. It also nicely shows why the controls have different part numbers and are orientated differently on the dash - the upper control has to come down past where a radio would go, whereas the lower control has to go across to fit above the turned-under part of the dash. Similarly the angle the sheath makes to the spindle varies - the upper control sheath has to pass over the cross-brace, whereas the lower one has to pass in front of it. It's pretty clever, really, that the designer came up with a method of achieving so many different orientations and angles using the same basic parts just assembled differently: