
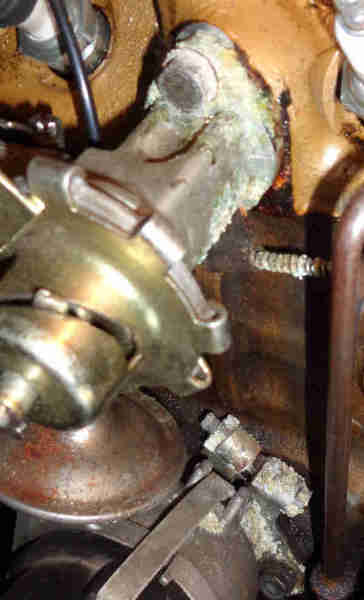
Crystalline deposits on the valve, temp gauge capillary and distributor plus more coolant in a tray under the engine show the leak from not being able to fully tighten the lower screw has got worse recently, so must be dealt with:
Previously I had researched helicoiling the block, but wasn't sure how cast-iron would stand up to that compared to steel or aluminium. Googling again I found several reference to J-B Welding a stud into the cast-iron, and using a nut, and that should work with the heater valve.
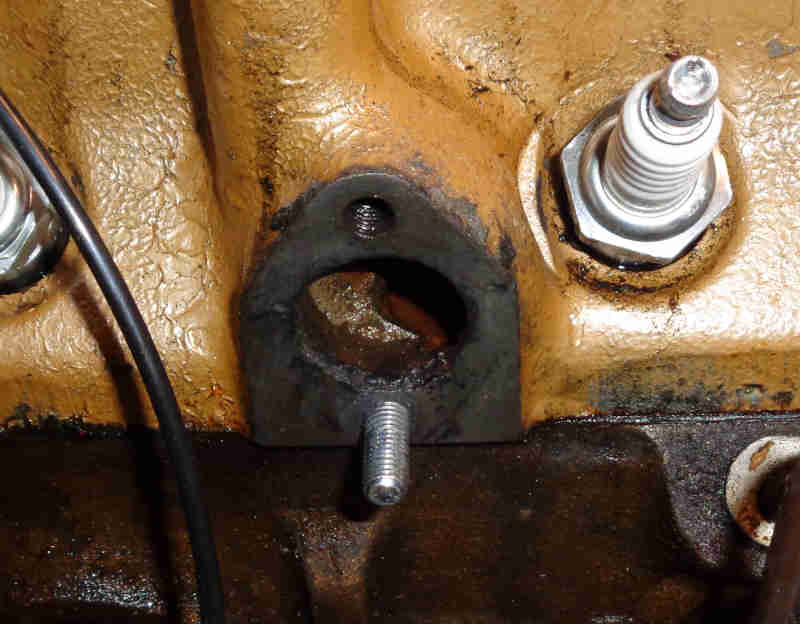
J-B Original is similar to Araldite but takes 15 hours to fully cure and then resists temperatures up to 500F constant, which is way more than enough. KwikWeld is 300F and sets quicker (4-6 hours) but softens at lower heat. With the valve off the tapped holes are 'blind', so no concerns about stuff getting into the cooling circuit. First run a tap down the hole to clean it out (not much danger of taking metal out in this case), and temporarily fit the stud to make sure it will go in far enough. I have to avoid putting too much JBWeld in the head threads and packing the bottom of the hole with it, so opt to coat just the first three threads of both stud and hole, screw it in with double-nuts, and wipe off the external excess. I leave it overnight to cure:
Next morning (a good 20 hours later) the remains of the mix were still malleable in that I could make an impression with a finger-nail, which wasn't good news, but then outside temps are barely above freezing overnight. Played a heat gun on it for a few minutes and it firmed up a bit, so used that on the stud as well although not ideal with the other things around it. A couple of hours later I checked the test piece and could make no impression which was good news, but in the meantime I remembered the cooks blow-torch which gives a much more focussed heat and played that on the stud for a couple of minutes, which started warming up the head round it, so should be fine. Only 4C in the garage so it didn't take much effort to decide to leave it until next day when it's due to be 7C. Didn't get above 4C for several days, so leave it some more.
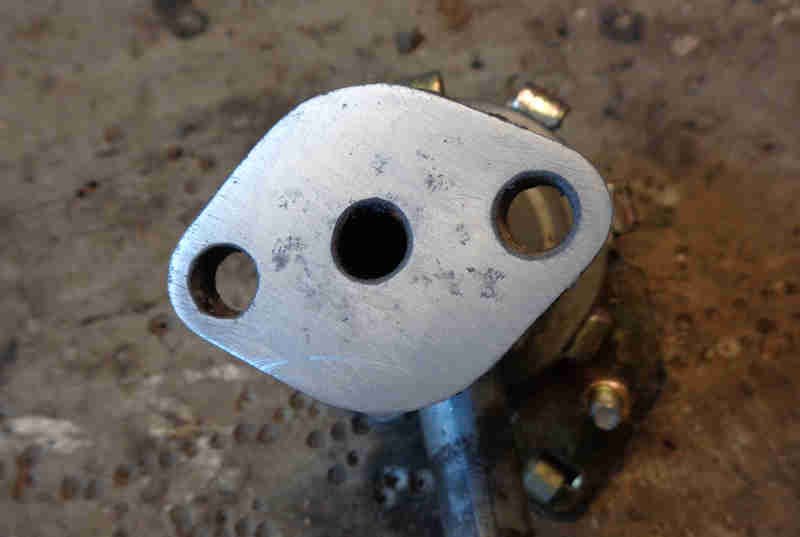
I had wondered if the base of the valve would be corroded as in the original and even the 'nine year' valve below but it polished up in no time on abrasive paper on a flat surface leaving just faint patches despite being 11 years old. Condition of the rubber was another concern as the previous replacement only lasted 9 years. Internally looked very clean as well, so I've opted to refit it, we shall see!
In the event it was left for well over a week as temps around zero gave me no encouragement to go into the garage and I couldn't use the cars anyway because of salt on the roads. When I did I had decided to use a new 3/4" UNF screw and lock washer for the top. I had some 3/4" (the correct size for the 4-cylinder, 7/8" for the V8) and 1" left over from Vee's repaint so started screwing a 3/4" in, but it was sloppy in the threads and wouldn't tighten. A nut on the threads was also sloppy, but snug on a 1", which was also a good fit in the head - most odd. So a 1" it will have to be but it needs cutting down as the blind threads won't take 1". When fitting a screw you haven't used before do a trial fit without a lock washer and make sure it at least nips up the valve to the head. If it does then you know it will fully tighten with a lock-washer fitted.
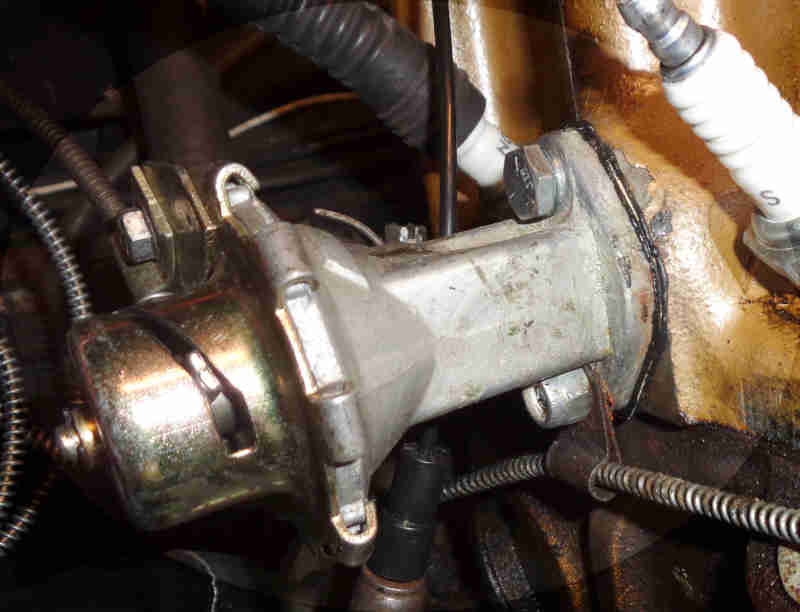
At least the nut on the new stud fully tightened, although it could have done with being about 1/4" longer. I was planning to use a plain nut and lock washer but couldn't find any new nuts, so used a Nyloc on its own as I had some of those. The support for the temp gauge capillary adds quite a bit of thickness and the end of the threads only just reaches into the nylon insert, really the stud should have been at least 1" allowing 3/8" into the head and some spare threads. As it is I'll keep an eye on it and may substitute a plain nut and lock-washer.