


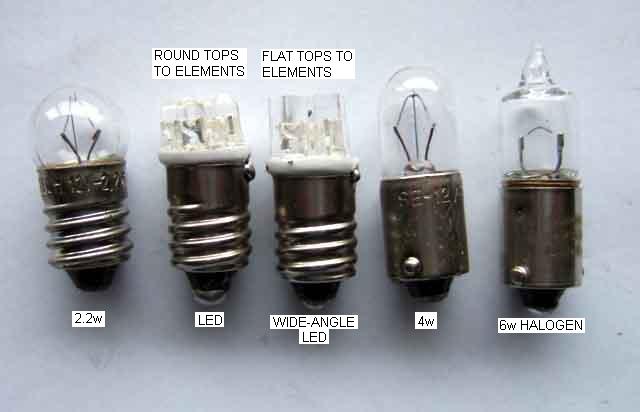
A few years ago there was a recommendation from America to fit Radio Shack 7.5v bulbs, but given the running voltage on the car of 14.5v or so they were a bit like a firework - bright, but short-lived! Subsequently halogen lamps were recommended (again from America), giving significantly more light output. If they are significantly higher current items they could damage the rheostat when used en-masse, and if they are much higher heat output they could also affect the instruments, switches etc. The LBCarco items are 5w for the small gauges and 10w for the speedo and tach, i.e. twice to four times the wattage of standard items (they also recommend a 3w item for what they describe as 'green film' gauges, possibly because the higher heat output of the higher wattage items damages these gauges. I've measured the current drawn by a standard 2.2W, a standard 4w, and a halogen 6w (all available in Halfords) and the halogen current is pro-rata with the tungstens at 200mA for the 2.2W, 300mA for the 4w, and 500mA for the 6w. However a set of 5w and 10w items will be drawing more 3 times more current through the rheostat than the standard bulbs. I've only been able to find 4w standard and 6w halogen bulbs with bayonet fittings in the UK, not screw. Whilst the 4w is comparable in price to the standard 2.2w bulb the 6w halogen is about 5 times the price and the LBCarco items are 10 times the price of standard bulbs! However Tesco 12v halogen 5w and 10w capsule wire ended bulbs are about the same price as standard tungsten, and the wire ends could possibly be soldered into screw caps of old standard bulbs. The feature of halogen is that they are brighter than standard tungsten for a given current. Tungsten could be made this bright but they wouldn't last very long (like the Radio Shack items) as metal is evaporated off the filament more quickly, eventually causing burn-out. Halogen gas has the effect that when the bulb is switched off, the metal that has been evaporated off the filament migrates back to the filament again as it cools. Effectively this is like starting with a brand-new bulb each time you turn it on! The down side is that they do run much hotter for a given wattage: at 10C ambient the 2.2w runs at 30C, the 4w at 55C, and the halogen at a whopping 90C. Also halogen bulbs should not be handled with the fingers as oils will be deposited onto the surface which will form a burnt-on film reducing output, increasing heat and shortening life. Given that the 5w and 10w items are 2 and 4 times the output of the standard bulbs, maybe ordinary tungsten at that wattage (if available in the correct size and fitting) would be almost as effective, run cooler, and be a lot cheaper.
Another alternative that cropped up on the MG Enthusiast BBS was an electro-luminescent ring which fitted inside the gauge. A link to a photo was posted, but without a 2nd gauge with standard illumination for comparison, hence there was no indication of how much brighter it actually was. Taking photos of lights is always problematic and the gauge numbers were quite dim. Someone posted that they were interested, 'but can you make the picture a bit brighter'! I don't know whether the request was genuine or tongue in cheek, but it certainly made me laugh.
Update August 2011: As one of his periodical sagas Herb Adler sent details on how he uprated his instrument lighting to use LEDs - see here and scroll down a bit. He used flexible 12v LED strip that can be cut into 50 or 100mm sections, each powered independently from 12v. The comparative photo he includes - although blurry - shows a remarkable difference in brightness and is probably the first time an MGB has warranted a dimmer. But of course the standard dimmer won't dim LEDs, so he also includes a section on using a potentiometer and resistor as an effective dimmer, glued onto the back of the rheostat mounting plate so the dash-front appearance is standard. There are a number of suppliers of this LED strip, found through Google, one of the cheapest being �13 per metre, but a lot of work to install.
So for me white 'plug-in' LEDs seems to be the way to go. Very low current and heat, and the super-brights really are bright - forward facing anyway. This UltraLeds.co.uk site has loads of automotive LED bulbs, the instrument types at least being about twice the price of standard bulbs so not too bad, but postage is a bit steep at nearly 4 quid for a single bulb and VAT is also extra. Note that LED replacements for external incandescent bulbs may not be legal in the UK, even though manufacturers are installing LED arrays in many cars these days which are legal, and I've seen one site that states that even LED instrument lights are not legal on UK public roads. I looked around at Maplins and bought a single oval high-brightness,
wide-angle LED as an experiment. Whilst very white and bright side-by-side with the standard incandescent yellow glow it is actually quite small, and inserted into the gauge it gave hardly any illumination at all. It is also a fiddle to use as one has to add a 1k resistor to limit current, and a diode to prevent reverse connection, as well as soldering it all to a screw-base to fit the car.
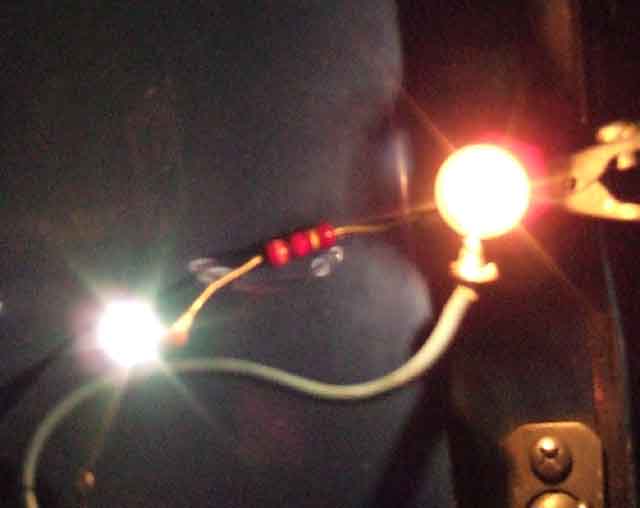
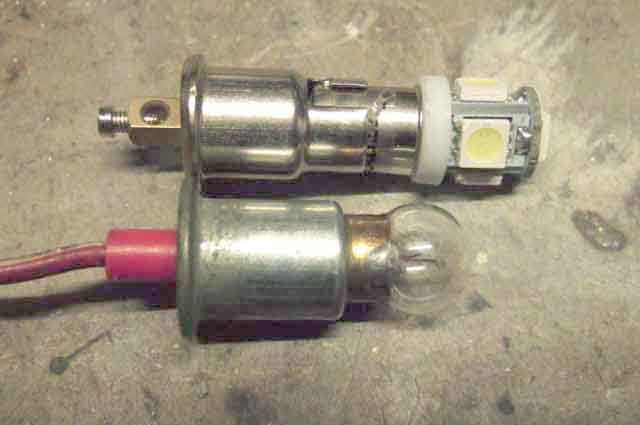
Given that the commercially available items contain four to six LEDs and are cheaper than I can buy all the bits for it just isn't worth the bother, so I ordered two LED bulbs from UltraLeds (now NLA) - one wide-angle and the other standard. Not too badly priced at �3 for the standard and �3.50 for the wide-angle, but post and packing added another �3.50 making each bulb about the same as Halfords 6w halogen. You could get a lot more bulbs for the same �3.50 p&p, though. These include six LEDs, a dropper resistor, and a diode array (for screw-in bulbs, a single diode for wedge types as these can be inserted either way round) so they will work with either polarity without damage. They are rated at 5w, but whereas with the standard tungsten you can multiply running current (typically 220mA) by supply voltage to get the wattage stamped on the bulb base, LEDs take about 1/10th the current. So when (if) an LED supplier gives a wattage they are generally indicating the relative brightness, although some do give the correct figures i.e. a 3.3v, 340mA I have seen really is the claimed 1W, and is very bright indeed (but before you get too excited physically not suitable for instruments). In the fuel gauge the UltraLeds are whiter, but probably no more legible. In the tach they are significantly brighter making the instrument easier to read.
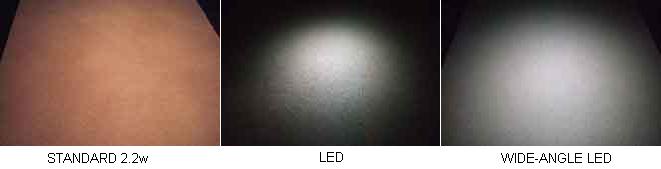
Standard and LED bulbs shining onto a board, showing the very much whiter light of the LEDs:
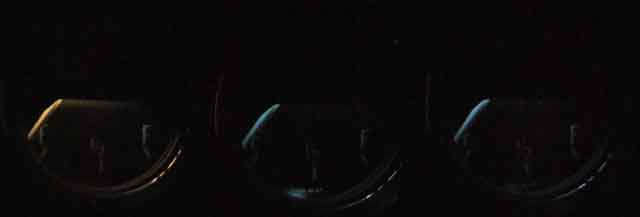
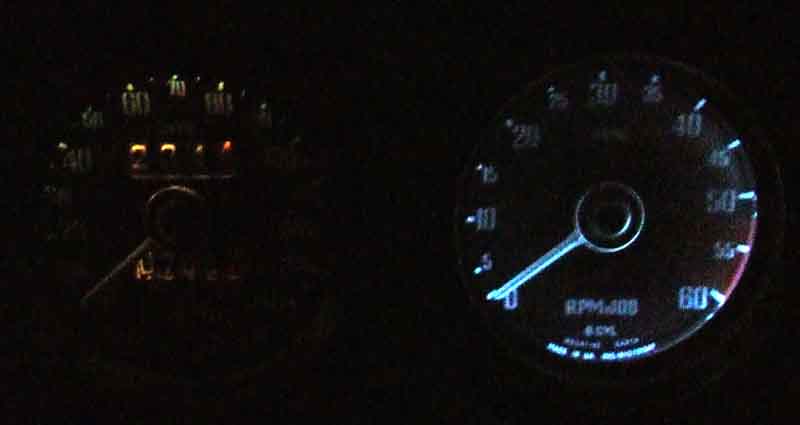
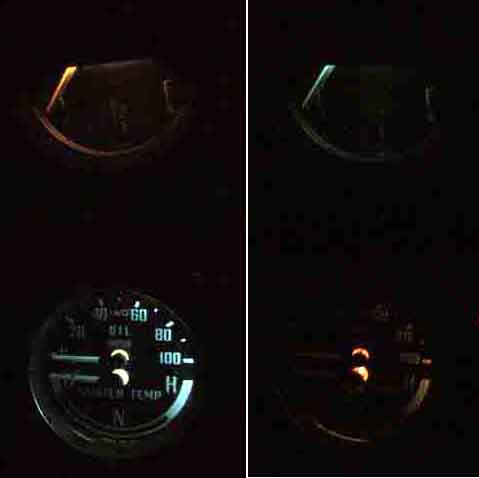
The following images are as I see them when driving and so are not intended to be bright enough to clearly read them, they just show the comparison between standard and Ultraleds LED bulbs.
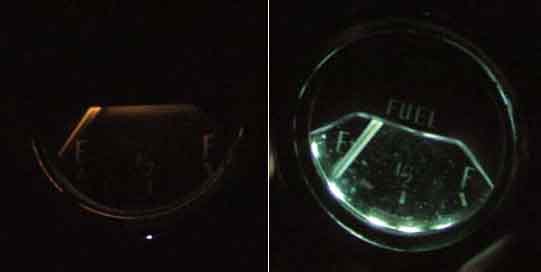
Fuel gauge with incandescent (left), standard LED (centre) and wide-angle LED (right) bulbs. Very little difference in legibility between the three, although the LED bulbs give a whiter glow.
Tach with incandescent (left), standard LED (centre) and wide-angle LED (right) bulbs. Both LEDs give a significant improvement in legibility over the incandescent, with the standard LED again being noticeably better than the wide-angle. To me the whiter light of the LEDs also gives a more attractive appearance over the yellow of the incandescent.
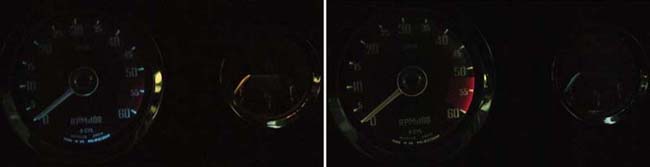
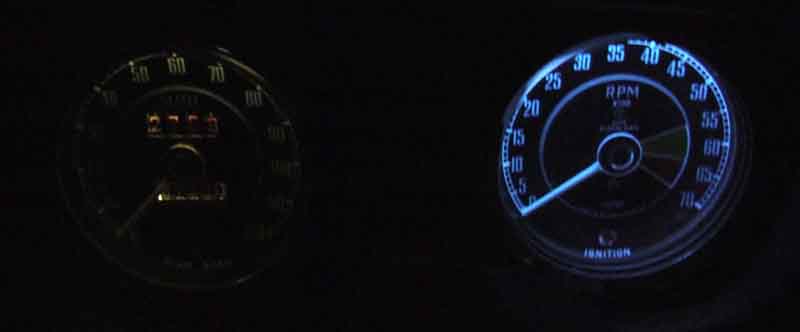
Update February 2011: Ultraleds doesn't seem to have those anymore, but a different design from eBay was mentioned on the MG Enthusiasts BB. Available in various colours and two angles, single element with a lens. I got a couple of white standard angle based on the results with Ultraleds type but the results were disappointing. Apart from the different colour there was no difference in legibility, in fact the LEDs could be very slightly worse. Probably a factor of the single-element design of these compared to the multi-element of the Ultraleds. There are green versions with a luminosity of 12,000 as opposed to the 8,400 of the white, these may be a bit better. I can't recommend them, but if you want to try them there is a selection from various 'shops' here. Left image has LED in the tach and standard in the fuel gauge, right image the other way round. Apart from the colour I'd say there was little difference in brightness and legibility, if anything the LEDs are not quite as good in the fuel gauge:
Update September 2011:
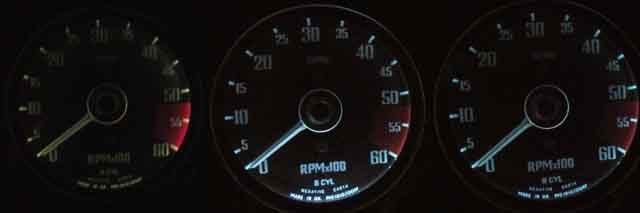
Goffy's MES single-element but large surface-area, 180-degree angle, direct-replacement LEDs. Very bright, but despite their 180 degree radiation only very similar results to the no longer available UltraLED multi-element type which are much more focused, even the wide-angle unit. This picture is a true comparison of an original with a LED as speedo and tach were photographed together, just moved closer together in Photoshop for convenience. Also like the UltraLED there is no increase in visibility in the ancillary instruments, just a change in hue, and quite expensive: (December 2018: NLA)
 But while Googling for those I spotted another type with one large yellow element covering the whole of the end of the 'bulb', and these were described as 'COB' instead of 'SMD. Googling that I discover that while SMD (Surface Mount Device) are packaged discrete LED units each with their own connections soldered to a PCB, COB are 'chip on board' which are bare LED chips directly in contact with a substrate to produce arrays. This allows for a much higher packing density and hence a higher number of lumens per square mm, for example giving nearly 10 times more elements in the same space compared to SMD, and nearly 40 times more than wire-ended leds. Some 1W on order, then I found some 2W so ordered those as well! The 1W were cancelled and refunded as they had apparently gone NLA, and the 2W ones arrived. Despite taking nearly twice the current at 60mA as opposed to 35mA for the 8 x 3020 type if anything they give slightly less illumination, and as they project much further - even further than the 5 x 5050 type, they would have more of a clearance issue.
February 2013:
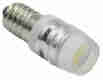
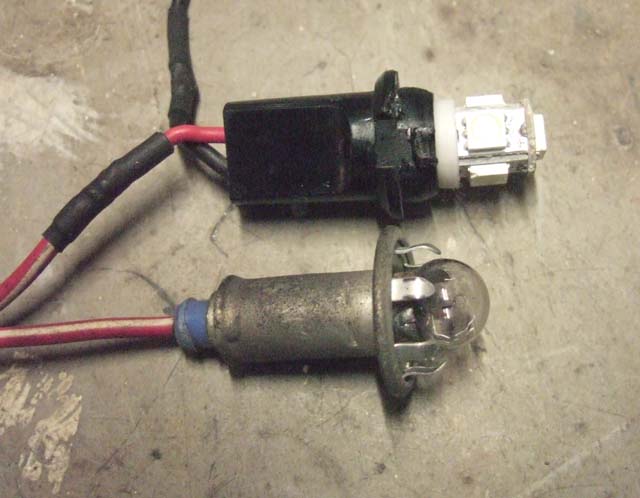
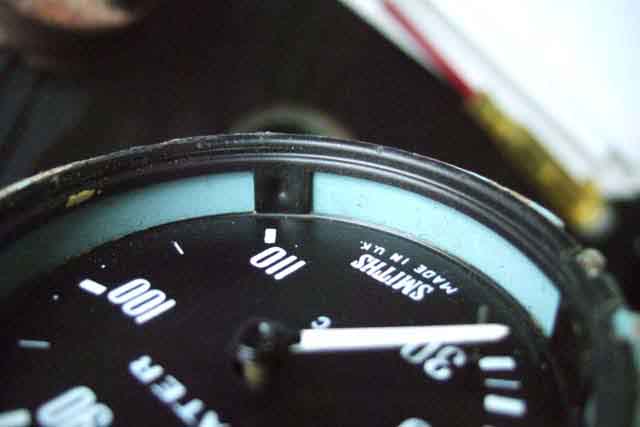
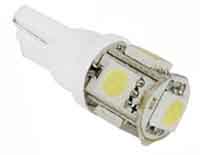 Still searching. As time goes by and the years mount, as well as infrequent driving of either of the MGBs at night blunting familiarity with what the needle angles mean, improved brightness is probably becoming more necessary for me now. Whilst investigating DRLs I came across a 5-element LED with a T10/wedge fitting for the V8 pilot lights (i.e. parking light fitted to the headlight reflector) as a possible option, very cheap at �2.20 for two. They proved pretty useless for that application, if anything they gave a smaller splodge (a technical term) of albeit blue/white light compared to the standard incandescent, but I thought it was worth trying them in the instruments. The wedge pilot light holder is just too small to fit the hole for the 'claw'-type holders used in the larger chrome bumper speedo and tach, but I held it in position for a quick test and it gave by far the best results of anything I've tried so far. Some have said they are not keen on the bluish tinge that comes from 'white' LEDs in the duck-egg blue painted cans, 'warm white' give a colour closer to the original incandescent, but with the brightness of the white:
The improvement is almost certainly due to the four radial elements being inside the case and more effective than any of the forward facing ones I have tried, even those with supposedly a 180 degree beam. I couldn't initially find any bulbs of this type with an MES (medium Edison screw, which is what all eight of my instrument bulbs are) fitting, but I found an old 'claw' fitting and was able to cut it down to act as an adapter between the gauge and the wedge holder (as a proof of concept, eventually this holder would have to go back in the headlight).
 There are however 'claw' BA9 holders and BA9 versions of this bulb, so changing the holder is another option. I got a couple of claw BA9 holders from Stoneleigh although the claws were a different shape, and disappointingly they were slightly too small to fit the roadster gauges (there seem to be a plethora of slightly different sizes of both these and the wedge holders). In the meantime someone sent me what they thought I needed, but although they had the correct claw they were MES and not BA9. However by cutting the claw flange off those, and the incorrect claws off the other, I soldered the two parts together to make the correct holder. Made up two of these and shipped them off to Michael Beswick who has also been investigating DRLs and better instrument lights with me. Michael sent me some odd wedge holders, and I had another one, and out of those of those I made up a couple that fitted the roadster gauges with a bit of tweaking.
 The ancillary gauges and the smaller V8 and rubber bumper tach and speedo have 12mm tubes on the backs for cylindrical bulb holders. As a quick test even pushing the bulb in to a fuel gauge as far as it would go the radial elements are shrouded by the cylinder and the results were no better than anything else I had tried. On the dual oil/temp gauge one of the Bourdon tubes goes right past the inner end of the cylinder, so this type of bulb is too long for the ancillary gauges at least. But I also picked up a couple of tubular BA9 holders as a result of Stoneleigh, and these were slightly too small as well i.e. there are several different sizes of this type of holder! However the tubes on the back of the gauges have slits in them so they can be 'adjusted' to suit. The five-element BA9s are superb in the V8 speedo and tach, just like the wedge versions in the roadster, so it is worth doing the mod. Unfortunately the holders on the V8 do not have bullet connections, but come out of the harness directly, so I have to cut the existing holders off and solder and heat-shrink the new ones on, with is something I usually try and avoid having to do. I then notice that the speedo isn't as bright initially, but goes brighter if I wiggle the holder, and then I notice the speedo needle is moving! I realise this longer bulb and holder are going further into the speedo and is fouling the innards. Fortunately the holder is such that I can modify it to hold the bulb about 1/2" further back (subsequently came across this shorter type), where it is as bright as the tach and no interference with the needle. It should be noted that 77 and later 'green film' gauges have a bubble of green plastic over the end of the tube inside the gauges, which will stop longer bulbs going in further than the originals. Which as well as shrouding the radial elements on these bulbs may mean the holder doesn't go into the gauge far enough to stop it falling out with the vibration encountered in normal use.
 I then wonder whether this is going to be a problem on the roadster as well. Remove the wedge holder ... no bulb. Search around behind the dash, no bulb, then realise it must have come out of the holder and dropped inside. By this time I'm quite adept at the 'James Herriot' position reaching over the tach to get to the speedo, and in through the dash with the fresh air vents removed, get the speedo out and can fiddle the bulb out of the hole, rather than having to open it up. This holder and bulb are about 1/4" longer than the claw and tungsten, which is a bit of a concern. Then I realise the collar on the base of the LED bulb is just too wide to go down inside the wedge holder as it should, but a 5/32" drill opens out the holder, and the bulbs goes in another 1/8" or more. So now not only is the bulb not in the speedo so far, it's held more securely in the holder as well, and I decide to do the tach as well even though there is nothing moving around in the back of the tach case like there is in the speedo.
 That leaves the ancillary gauges. I've done all the testing of different bulbs in the fuel gauge as that is so easy to get to, and none of them have made it any more legible then the original bulbs. With the fresh-air vents out to get to the dual gauge I put my best MES (screw-in) LEDs in that - and the results are as good as the large gauges! The fuel must be so poor because the holder is at the bottom so the light has to go up to the top before it can come down onto the face, whereas in the oil/temp it is at the top to start with. I'll have to try painting the inside (spare gauge first - when I can find it again) and see how that goes. But arguably that is the least important, and I can still see the angle of the needle. It would be nice to get that as good as the others though.
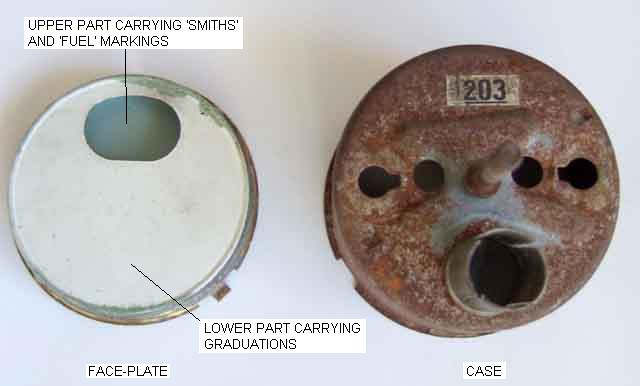
Well I did find my old fuel gauge, and though a combination of factors realised why that doesn't improve with the LED bulbs like the others do. The other three are 'edge-illuminated', which means light come through a gap all the way round between the face-plate and the case. But the fuel gauge has the bulb at the bottom of the case back, and the only passage for light to get to the pointer and markings is through a hole at the top of the rear layer of the face-plate. The light has to reflect off the inside of the case to get through the hole, then off the back of the front layer of the face-plate to get to the markings. I even tried removing the innards and fitting the face plate 180 degrees out so the light was pointing at the hole, but it didn't make that much difference, and would have required a lot of work to move the bulb to that position anyway.
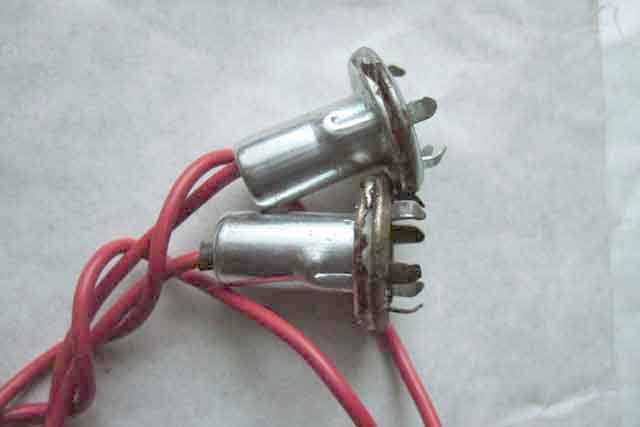
This is despite the 'sockets' for the bulb holders being that much longer on oil/temp gauges (top) than the fuel gauge (bottom) ...
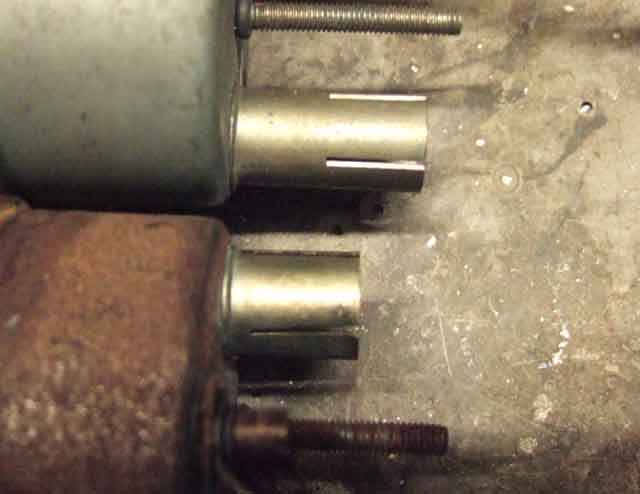
... which means that the bulb for the fuel gauge is effectively inside the case whereas on the oil/temp gauges it is back inside the tube.
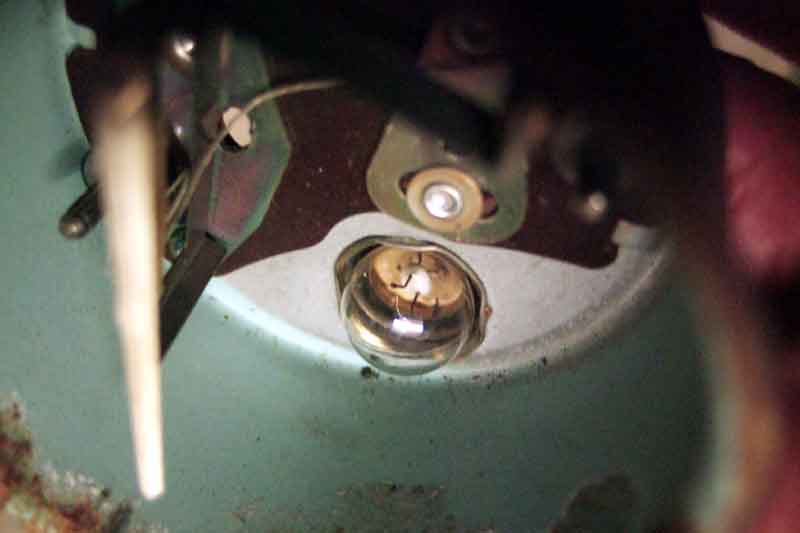
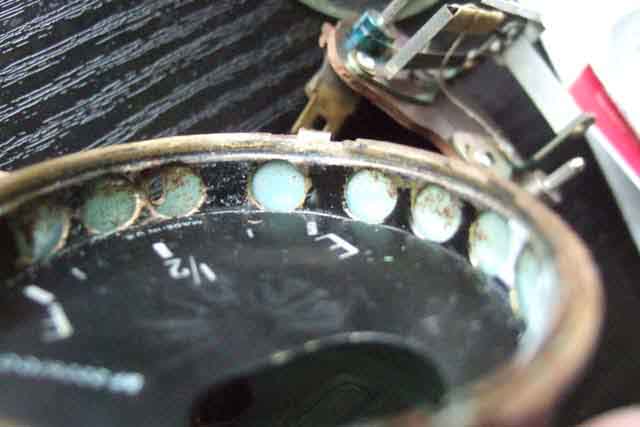
 With the edge illumination on the other three gauges, there are gaps between the outer perimeter of the face-plate and the inside of the case, so light escapes almost directly, and all the way round. This old temp gauge shows what I mean about edge-illuminated: There are slots cut into the edge of the face plate, covered by a translucent plastic strip to diffuse what comes through. The pale blue here is the inside of the case seen through the slots in the face-plate, translucent strip removed.
Apart from those slots the physical design of the face plates is the same - fuel face-plate on the top, old temp gauge face-plate below:

So can I cut slots in the fuel gauge? It's only thin brass to will distort easily, and a drill might tear it to shreds. But I have a one-hole punch ...
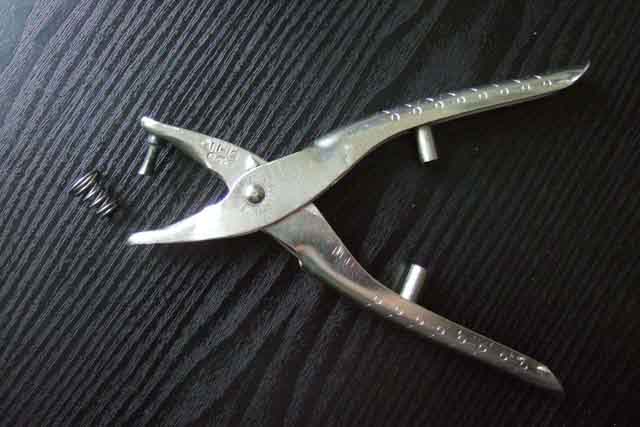
... and with the spring removed that is the perfect size and angle to punch a series of holes.
Filch the translucent strip from the temp gauge, and reassemble.
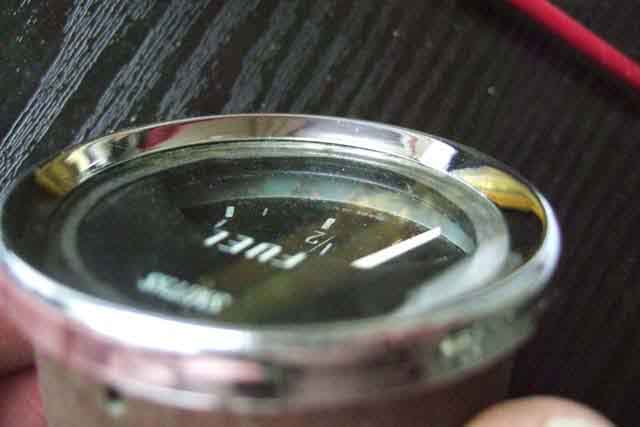
Now, at long last, I have a fuel gauge that is as bright as the others.
But this is only an old gauge, I came to the conclusion it probably wasn't worth the effort of modifying the two in the cars, so they will always be the weakest.
Go here for a usable solution.