
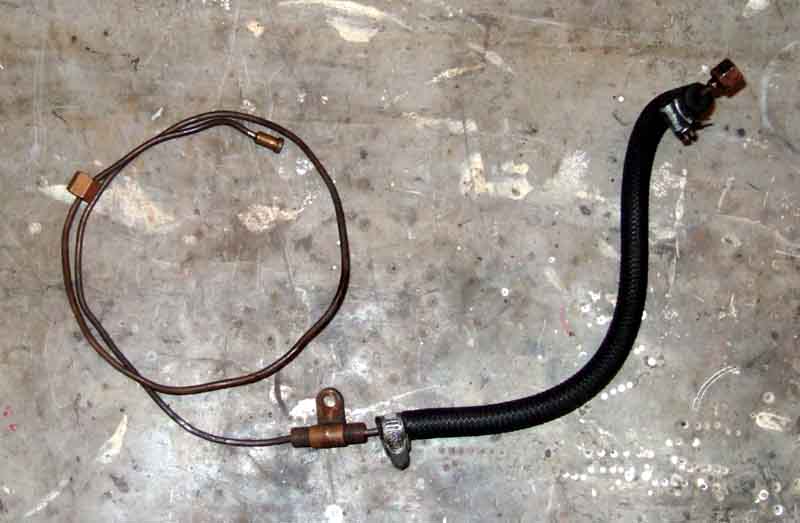
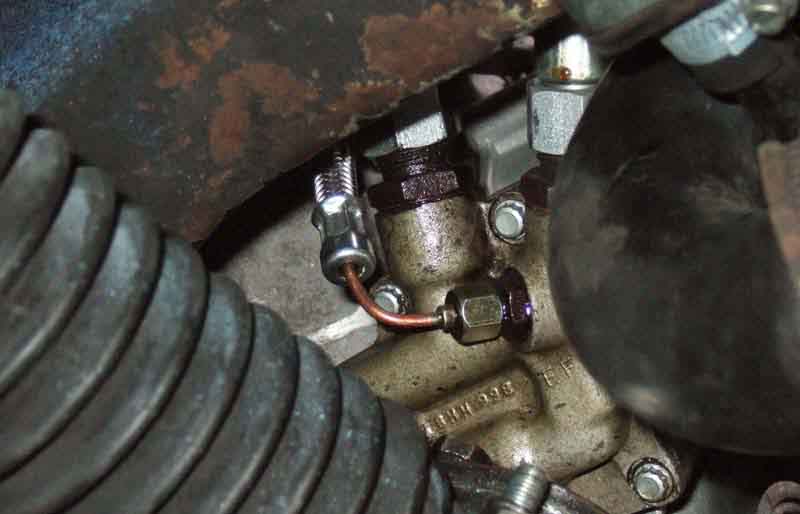
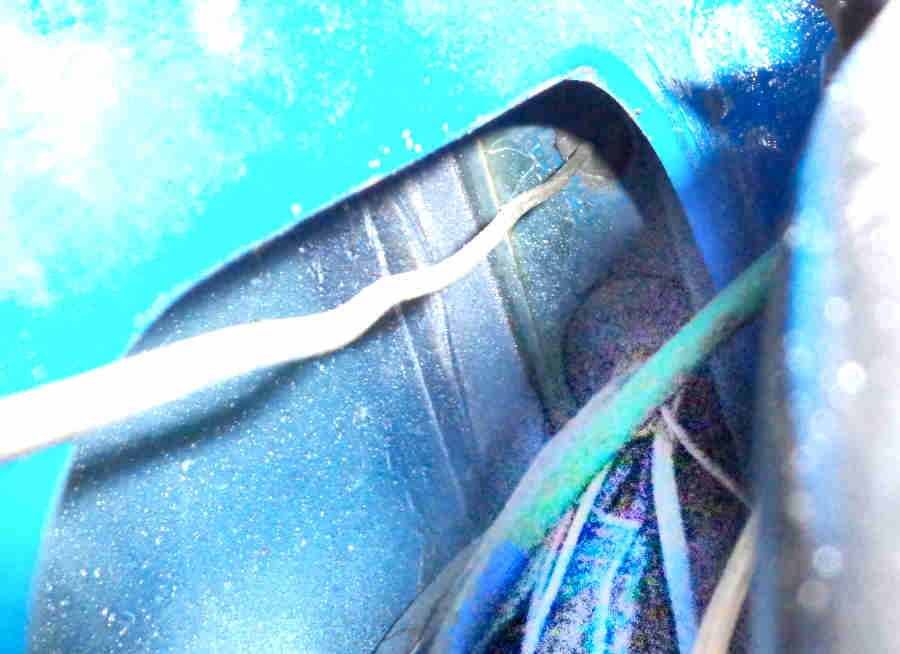
4-cylinder: Bee's original connector as I found it - the gauge pipe has had the fitting cut off and the end of the pipe fed through the connector direct into the hose and secured with a hose clamp. Originally there would have been a short length of pipe with a fitting at this end of the pipe as there is at the block end. Presumably one of the pipes fractured at the connector, hence this cheap 'fix':
The connector has support bracket AHH6938 with spacer AHH6247 underneath. The bracket prevents the connector twisting as the hose and pipe nuts are slackened/tightened. However that does make for quite a convoluted route to go through the hole in the side of the tunnel when there is a grommeted hole almost immediately behind the connector, used for the heat control here: (MGE)
Unlike mine that shows the connector on the heater side of the screw, but other pictures including several in Clausager show the same with another P-clip for the temp gauge capillary on the master-cylinder side of the screw. This looks neat and lines up both for the grommeted holes in the heater shelf. In this image it's not clear but the oil pipe may be going through the same grommet as the heater cable: (MGE)
I was only aware of one P-clip on the capillary and that goes on the lower heat valve screw (not the upper one as in the same image). Also yet more pictures show the speedo cable using that side hole, although there is one for that in yet another position in the tunnel.
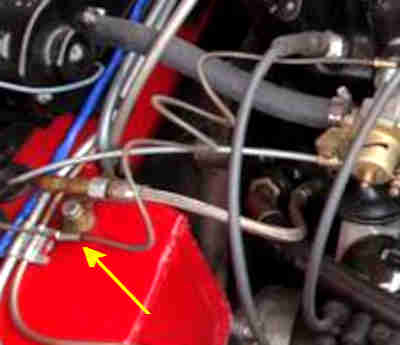
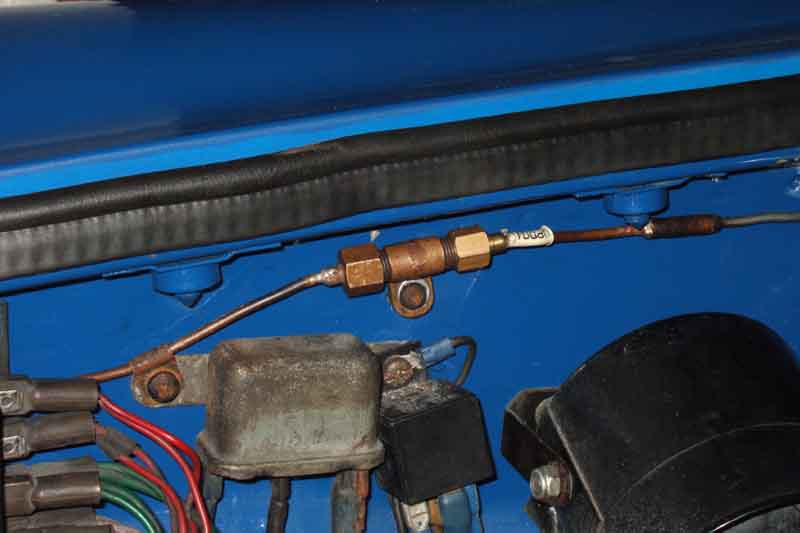
On 4-cylinder cars the oil gauge pipe has a P-clip in the cabin, on CB cars near the top right-hand corner of the cold-air flap as shown here: (MG Experience)
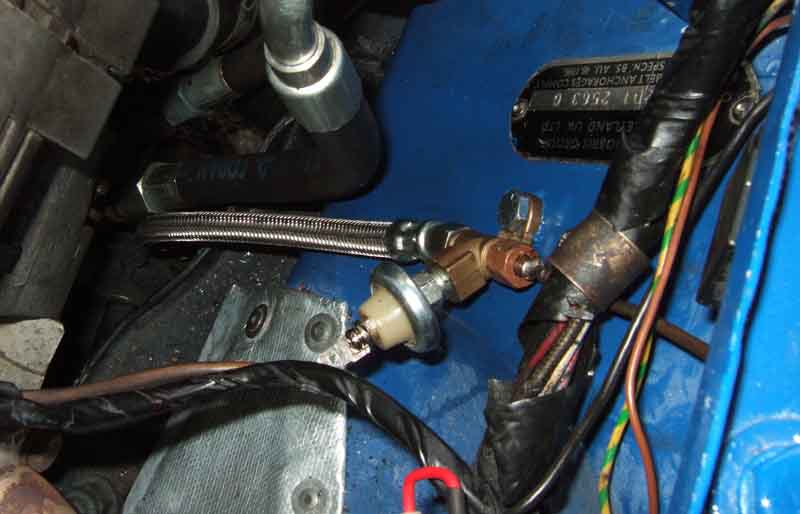
And on RB lower down and further to the right as here:
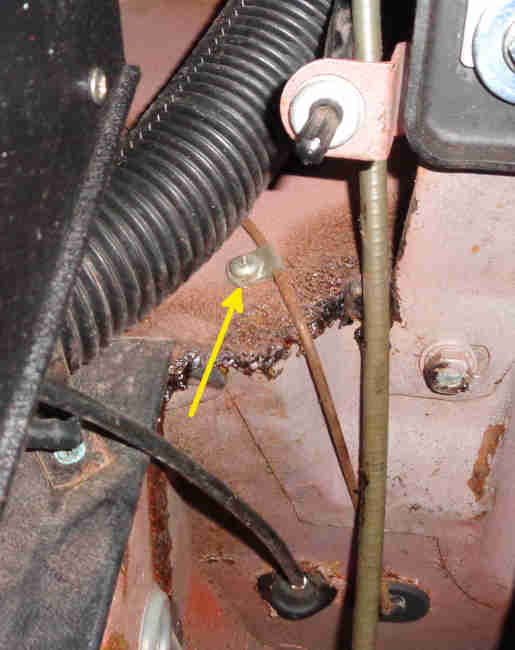
The fixing screw goes through into the air-box, visible through the first 'square' hole in the grille on the right (heater motor side):
V8s have a different route along the top of the inner wing with a P-clip to a starter relay fixing screw and into the cabin above the main harness. With a longer run behind the dash there seems to be (by touch) a P-clip above the steering column, and my 75 i.e. RB temp gauge capillary has a P-clip in the CB 4-cylinder oil pipe position, not the RB 4-cylinder position.
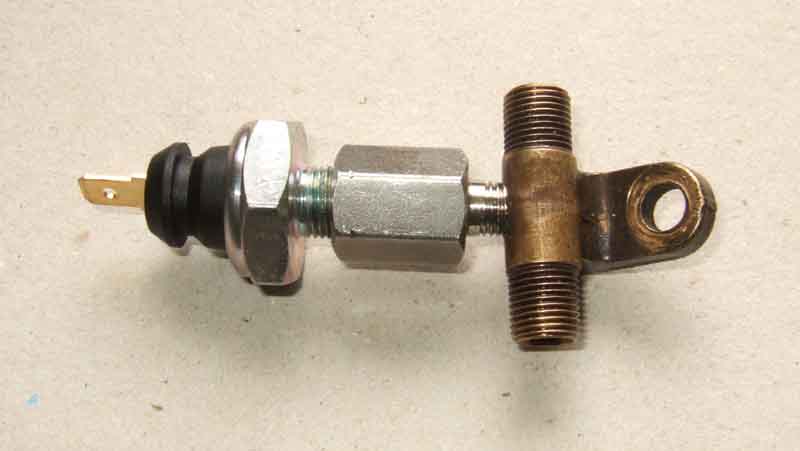
The North American connector with the tapping for an oil pressure switch:

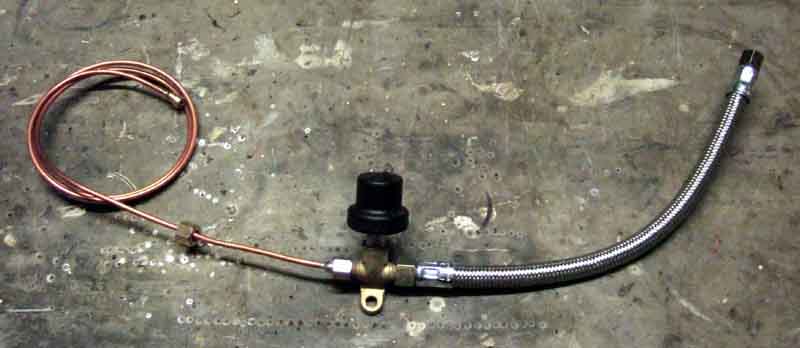
New Teflon-cored hose, North American connector with pressure switch fitted, and new gauge pipe:
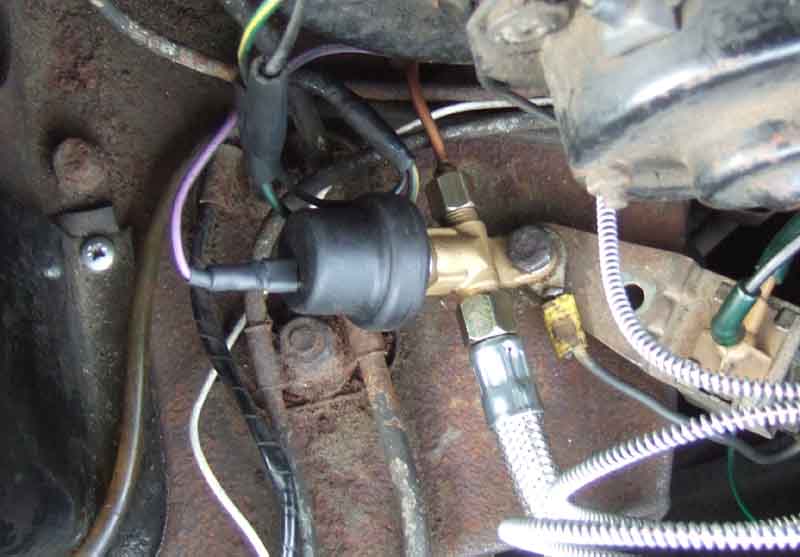
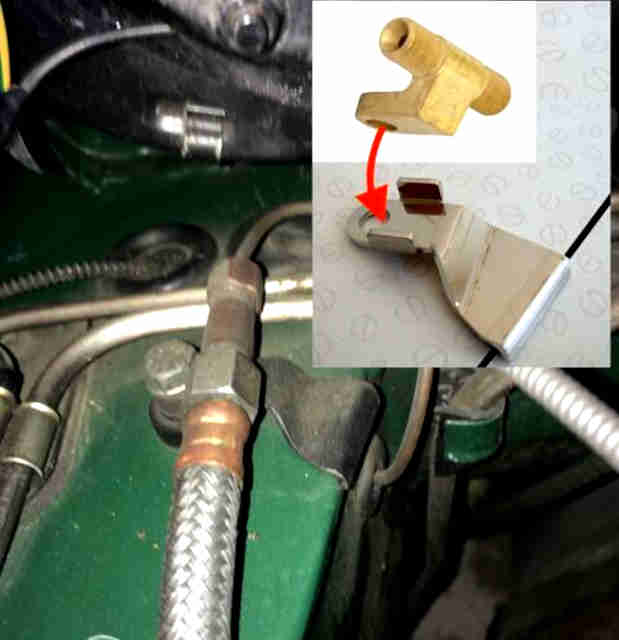
Standard connector modified to take a switch:
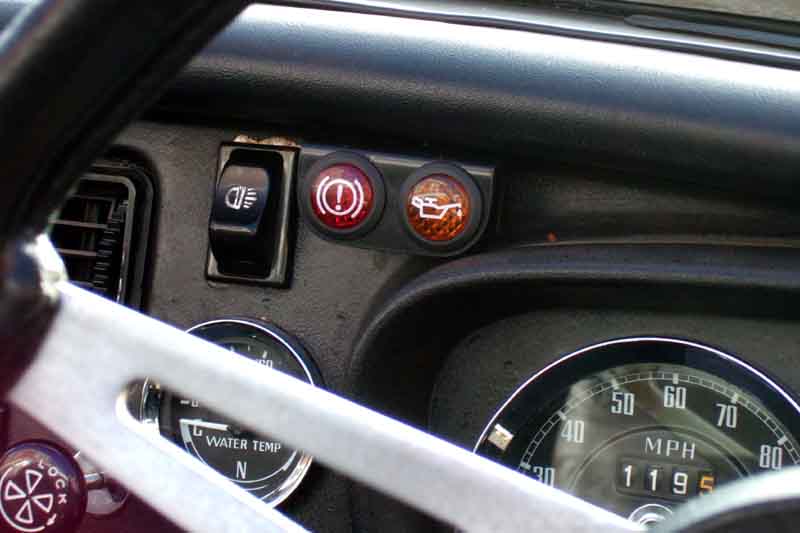
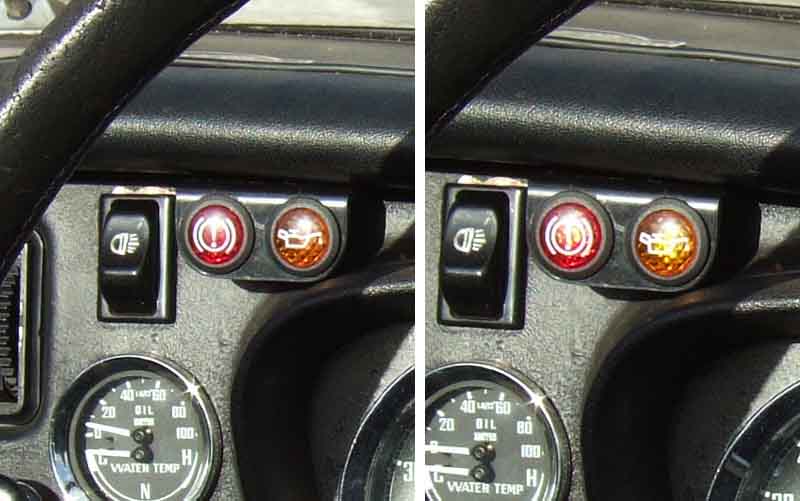
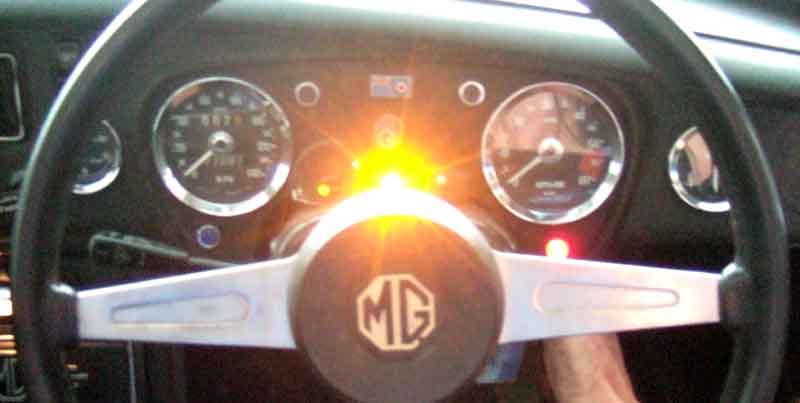
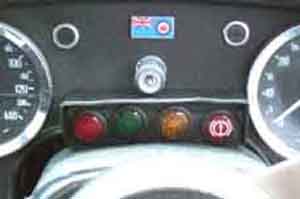
Warning light unobtrusive ordinarily ...
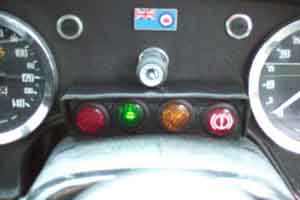
... but very obvious when illuminated, compare it to the ignition warning light which is also on. I did intend to fit the orange version, my local Maplin were showing two so ordered one and trooped down there to be told they couldn't find them! I'm not paying postage on a 99p item, and happened to have a red one to hand, so that's what went in. Subsequently bought one and they are indistinguishable from red!

After-market warning lights modified with superbright LEDs: Visible from the driving seat, off ...
... and on in bright but not direct sunlight:
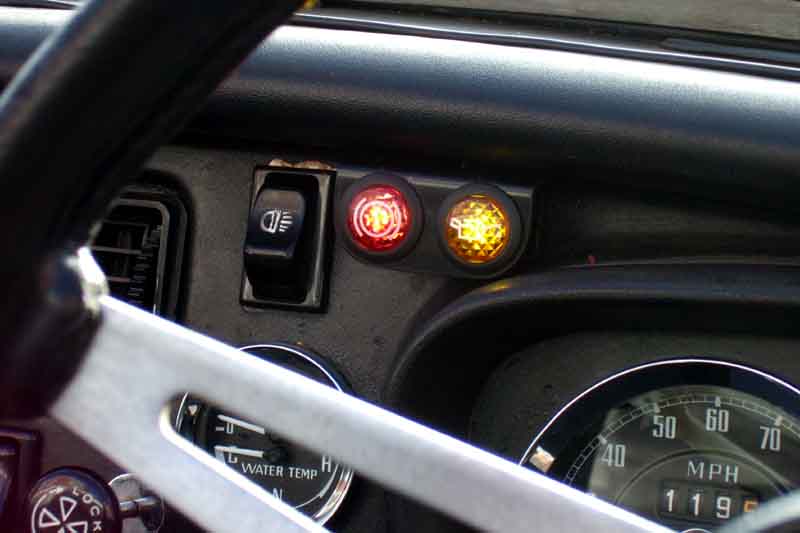
However less visible in low direct winter sun - off on the left, illuminated on the right. Maybe a cowl? They are angled towards the driving position:
V8: Hose to oil pump at the front of the engine:
3-port connector and oil switch on the inner wing:
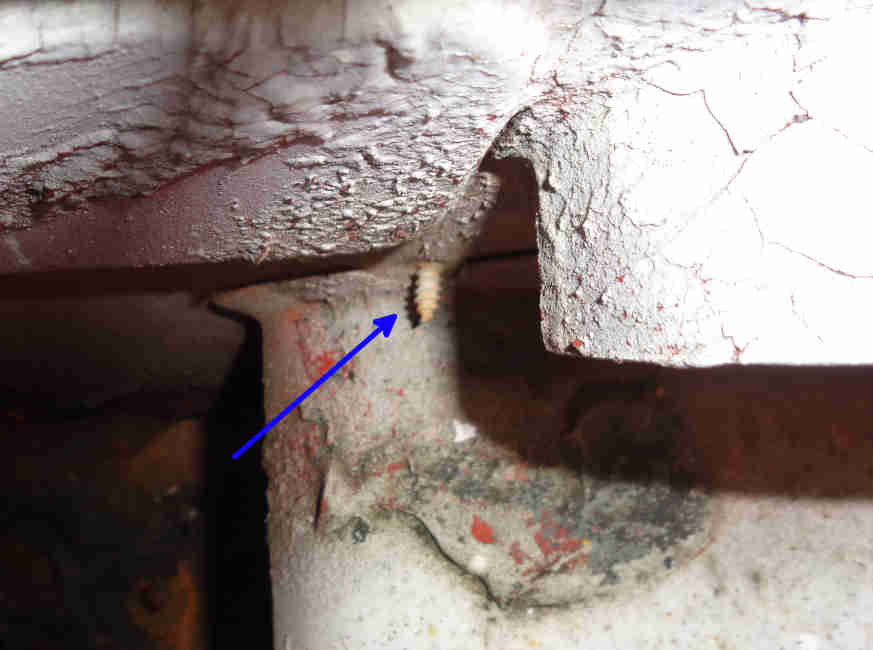
2-port connector by the starter relay to eliminate the original short section of hose between two pipes. This needed a blind fixing as it goes into the box-section behind the panel:
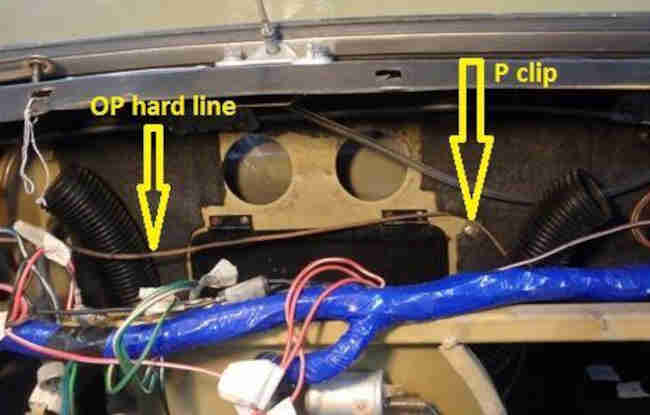
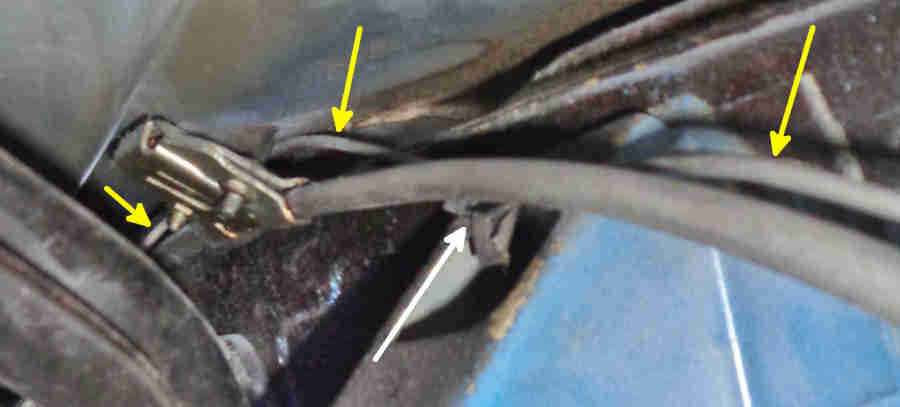
The pipe goes through the bulkhead above the main harness:
Then across behind the dash and over the wiper box (yellow arrows). There may be a P-clip above the steering column (white arrow):
As sunlight masking it is not such an issue in the GT, and I happened to have a high-brightness orange LED to hand, I fitted that in the same position as the original 'OD inhibited' warning light on the roadster, between the coolant and brake fluid level warning systems, rather than messing about getting a pukka 'oil warning' warning light and swapping the LED as I had for Bee. Not terribly elegant, really all three could do with being pukka warning lights in a mini console, but that's quite a big job. If I could have got a coolant level warning to match the brake and oil warning versions that are available, I'd have been tempted:
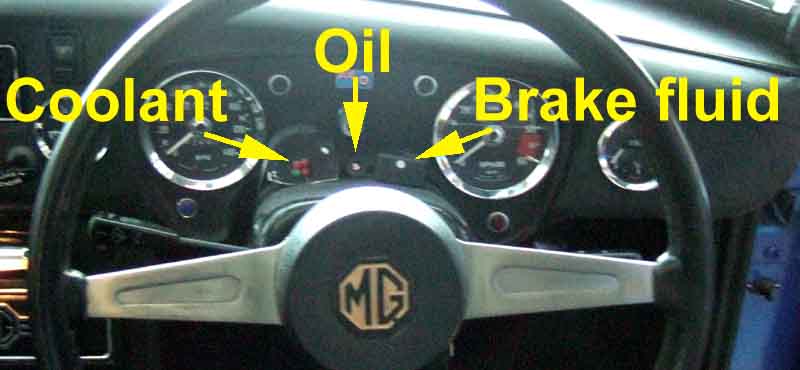
Hopefully won't miss that, the ignition warning light is lower right, and the 'coolant OK' green LED immediately to the left:
Not a pretty sight physically though, and winter 2018/19 gives me plenty of time to ponder options for improvement. Car Builder Solutions have a huge range of warning lights and I had used brake and oil with logo and simple black bezel for Bee. None with a 'coolant' logo though but I can use plain red and green as I intend to keep the same green for good and red for bad as now. Somehow I ended up with plain orange for the oil, and although they are Ł4.80 instead of Ł6.40 for the one with the logo, when buying four surely not even I'm that tight! As before the supplied LEDs aren't really bright enough even for the GT, so again I pick the lens off all of them except the green for the coolant as that is the only one that will be lit when driving, and swap them for high-brightness versions - the most effective being 'water-clear' types that only show colour when lit such as these from RS Components, rather than those with coloured bodies, although even those aren't quite as bright as the ones I used to be able to get from Maplins. The wires on the LEDs are bent to an angle then little springs push onto those, the other end of the springs fitting over internal spikes from the spade connections on the back, so it's not that big a job. They do contain tiny resistors as well, I use alternatives matched to the characteristics of the LEDs I'm using, and as they are physically bigger I splice them into the flying leads going back to the modules. As it happens two out of the four didn't work out of the box anyway as one of the springs wasn't seated correctly.
At 23mm dia a housing can be made that just fits under the instrument light dimmer, which can still be turned, not that I ever do. Make a former in card, then transfer that onto the inevitable black plastic square-section drain-pipe, cut out, and bend with a heat-gun. The flat panel for the lights is easy enough, but the housing is quite tricky to bend neatly due to its small size, and ends up not as good as I would like. As the coolant warning has been a bit erratic sometimes showing red at switch-on then changing to green as it warms up, probably because the calibration is not quite right and I've had to alter that once before, I design a new circuit using an op-amp (instead of discrete transistors) calibrated for the practical resistances encountered from the sensor, and include a self-check flash of red but without the beep of the brake sensor. Fit that into another little Hammond enclosure like the brake, with external wiring for the warning lights, supply and sensor. I also remove the LED from the brake module and extend that on wires to its new warning light, then slot all four into the housing and tuck the housing under the dimmer control. Reconnect to the existing wiring behind the dash, and all works in a garage-test, although with a holiday and salt on the roads since it still awaits an extended test.
All off ...
| Normal running:
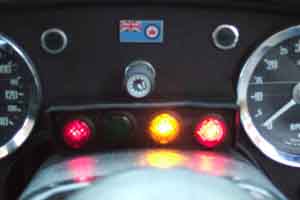
| Full son et lumiere:
|